Internet Programming with Java Course
2.1 Създаване на user interface с Java. Въведение в AWT.
2.2 Създаване на Java аплети – основни концепции
Applets
Hello World: The Applet
The reason people are excited about Java as more than just another OOP language is because it allows them to write interactive applets on the web. Hello World isn't a very interactive program, but let's look at a webbed version.
import java.applet.Applet;
import java.awt.Graphics;
public class HelloWorldApplet extends Applet {
public void paint(Graphics g) {
g.drawString("Hello world!", 50, 25);
}
}
The applet version of HelloWorld is a little more complicated than the HelloWorld application, and it will take a little more effort to run it as well.
First type in the source code and save it into file called HelloWorldApplet.java. Compile this file in the usual way. If all is well a file called HelloWorldApplet.class will be created. Now you need to create an HTML file that will include your applet. The following simple HTML file will do.
<HTML><HEAD><TITLE> Hello World </TITLE></HEAD> <BODY> This is the applet:<P> <applet code="HelloWorldApplet.class" width="150" height="50"> </applet></BODY></HTML>Save this file as HelloWorldApplet.html in the same directory as the HelloWorldApplet.class file. When you've done that, load the HTML file into a Java enabled browser like Internet Explorer 4.0 or Sun's applet viewer included with the JDK. You should see something like below, though of course the exact details depend on which browser you use.
If you're using the JDK 1.1 to compile your program, you should use the applet viewer, HotJava, Internet Explorer 4.0 or later, or Netscape 4.0.6 or later on Windows and Unix to view the applet. Netscape Navigator 4.0.5 and earlier and 3.x versions of Internet Explorer do not support Java 1.1. Furthermore, no Mac version of Navigator supports Java 1.1.
If the applet compiled without error and produced a HelloWorldApplet.class file, and yet you don't see the string "Hello World" in your browser chances are that the .class file is in the wrong place. Make sure HelloWorldApplet.class is in the same directory as HelloWorld.html. Also make sure that you're using a version of Netscape or Internet Explorer which supports Java. Not all versions do.
In any case Netscape's Java support is less than the perfect so if you have trouble with an applet, the first thing to try is loading it into Sun's Applet Viewer instead. If the Applet Viewer has a problem, then chances are pretty good the problem is with the applet and not with the browser.
What is an Applet?
According to Sun
"An applet is a small program that is intended not to be run on its own,
but rather to be embedded inside another application....The Applet class
provides a standard interface between applets and their environment."
Four definitions of applet:
- A small application
- A secure program that runs inside a web browser
- A subclass of
java.applet.Applet - An instance of a subclass of
java.applet.Applet
public class
Applet extends Panel
java.lang.Object | +----java.awt.Component | +----java.awt.Container | +----java.awt.Panel | +----java.applet.AppletThe APPLET HTML Tag
Applets are
embedded in web pages using the <APPLET> and </APPLET> tags. The <APPLET> tag is similar to the <IMG> tag. Like <IMG> <APPLET> references a source file that is not part of the HTML page on which
it is embedded. IMG elements do this with the SRC attribute. APPLET
elements do this with the CODE attribute. The CODE attribute tells the browser where to look for the compiled .class
file. It is relative to the location of the source document. Thus if you're
browsing http://metalab.unc.edu/javafaq/index.html and that page references an
applet with CODE="Animation.class", then the file Animation.class should be at the URL
http://metalab.unc.edu/javafaq/animation.class.
For reasons
that remain a mystery to HTML authors everywhere if the applet resides
somewhere other than the same directory as the page it lives on, you don't just
give a URL to its location. Rather you point at the CODEBASE.
The CODEBASE attribute is a URL that points at the directory where the .class
file is. The CODE attribute is the name of the .class file itself. For instance if on
the HTML page of the previous section you had written
<APPLET
CODE="HelloWorldApplet.class" CODEBASE="classes" WIDTH=200 HEIGHT=200></APPLET> then the browser would have tried to find HelloWorldApplet.class in the classes directory in the same directory as the HTML page that included the applet. On the other hand if you had written
<APPLET CODE="HelloWorldApplet.class" CODEBASE="http://www.foo.bar.com/classes" WIDTH=200 HEIGHT=200></APPLET>
then the browser would try to retrieve the applet from http://www.foo.bar.com/classes/HelloWorldApplet.class regardless of where the HTML page was.
In short the applet viewer will try to retrieve the applet from the URL given by the formula (CODEBASE + "/" + code). Once this URL is formed all the usual rules about relative and absolute URLs apply.
You can leave off the .class
extension and just use the class name in the CODE attribute. For
example,
<APPLET CODE="HelloWorldApplet" CODEBASE="http://www.foo.bar.com/classes" WIDTH=200 HEIGHT=200></APPLET>
If the applet is in a non-default package, then the full package qualified name must be used. For example,
<APPLET CODE="com.macfaq.greeting.HelloWorldApplet" CODEBASE="http://www.foo.bar.com/classes" WIDTH=200 HEIGHT=200></APPLET> In this case the browser will look for http://www.foo.bar.com/classes/com/macfaq/greeting/HelloWorldApplet.class so the directory structure on the server should also mirror the
package hierarchy.
The HEIGHT and WIDTH
attributes work exactly as they do with IMG, specifying how big
a rectangle the browser should set aside for the applet. These numbers are
specified in pixels and are required.
Spacing Preferences
The <APPLET> tag has several attributes to define how it is positioned on the
page.
The ALIGN
attribute defines how the applet's rectangle is placed on the page relative to
other elements. Possible values include LEFT, RIGHT, TOP, TEXTTOP, MIDDLE, ABSMIDDLE, BASELINE, BOTTOM and ABSBOTTOM.
This attribute is optional.
You can specify an HSPACE and a
VSPACE in pixels to set the amount of blank space between an applet and
the surrounding text. The HSPACE and VSPACE attributes are optional.
<APPLET code="HelloWorldApplet.class" CODEBASE="http://www.foo.bar.com/classes" width=200 height=200 ALIGN=RIGHT HSPACE=5 VSPACE=10></APPLET>The ALIGN, HSPACE, and VSPACE
attributes are identical to the attributes of the same name used by the <IMG>
tag.
Alternate Text
The <APPLET> has an ALT attribute. An ALT attribute is used by a browser that understands the APPLET tag
but for some reason cannot play the applet. For instance, if you've turned off
Java in Netscape Navigator 3.0, then the browser should display the ALT text.
Note that I said it should, not that it does.
The ALT tag is optional.
<applet code="HelloWorldApplet.class" CODEBASE="http://www.foo.bar.com/classes" width=200 height=200 ALIGN=RIGHT HSPACE=5 VSPACE=10 ALT="Hello World!"></APPLET>
ALT is not used by
browsers that do not understand <APPLET> at all. For that purpose <APPLET> has been defined to require a closing tag, </APPLET>. All raw text between the opening and closing <APPLET> tags is ignored by a Java capable browser. However a non-Java
capable browser will ignore the <APPLET> tags instead and read the
text between them. For example the following HTML fragment says Hello to people
both with and without Java capable browsers.
<APPLET code="HelloWorldApplet.class" CODEBASE="http://www.foo.bar.com/classes" width=200 height=200 ALIGN=RIGHT HSPACE=5 VSPACE=10 ALT="Hello World!"> Hello World!<P></APPLET>Naming Applets
You can give an applet a name by using the NAME
attribute of the APPLET tag. This allows communication between different applets on the
same Web page.
<APPLET code="HelloWorldApplet.class" Name=Applet1 CODEBASE="http://www.foo.bar.com/classes" width=200 height=200 ALIGN=RIGHT HSPACE=5 VSPACE=10 ALT="Hello World!"> Hello World!<P></APPLET>JAR Archives
HTTP 1.0 uses a separate connection for each request. When you're downloading many small files, the time required to set up and tear down the connections can be a significant fraction of the total amount of time needed to load a page. It would be better if you could load all the HTML documents, images, applets, and sounds a page needed in one connection.
One way to do this without changing the HTTP protocol, is to pack all those different files into a single archive file, perhaps a zip archive, and just download that.
We aren't quite there yet.
Browsers do not yet understand archive files, but in Java 1.1 applets do. You
can pack all the images, sounds, and .class files an applet needs into one JAR
archive and load that instead of the individual files. Applet classes do not
have to be loaded directly. They can also be stored in JAR archives. To do this
you use the ARCHIVES attribute of the APPLET tag
<APPLET CODE=HelloWorldApplet WIDTH=200 HEIGHT=100 ARCHIVES="HelloWorld.jar"> <hr> Hello World! <hr></APPLET>In this example, the applet
class is still HelloWorldApplet. However, there is no HelloWorldApplet.class file to be downloaded.
Instead the class is stored inside the archive file HelloWorld.jar.
Sun provides a tool for creating JAR archives with its JDK 1.1. For example,
% jar cf HelloWorld.jar
*.class
This puts all the .class files in the current directory in the file named "HelloWorld.jar". The syntax of the jar command is deliberately similar to the Unix tar command.
The OBJECT Tag
HTML 4.0
deprecates the <APPLET> tag. Instead you are supposed to use the <OBJECT> tag. For the purposes of ewbedding applets, the <OBJECT> tag is used almost exactly like the <APPLET> tag
except that the class attribute becomes the classid attribute. For
example,
<OBJECT classid="MyApplet.class" CODEBASE="http://www.foo.bar.com/classes" width=200 height=200 ALIGN=RIGHT HSPACE=5 VSPACE=10></OBJECT> The <OBJECT> tag is also used to embed ActiveX controls and other kinds of
active content, and it has a few additional attributes to allow it to do that.
However, for the purposes of Java you don't need to know about these.
The <OBJECT> tag is supported by Netscape 4.0 and later and Internet Explorer
4.0 and later. It is not supported by earlier versions of those browsers so <APPLET> is unlikely to disappear anytime soon.
You can support both by placing an <APPLET> element inside an <OBJECT> element like this:
<OBJECT classid="MyApplet.class" width=200 height=200> <APPLET code="MyApplet.class" width=200 height=200> </APPLET></OBJECT> Browsers that
understand <OBJECT> will ignore its content while browsers that don't will display its
content.
PARAM elements are the same for <OBJECT> as for <APPLET>.
Finding an Applet's Size
When running inside a web browser the size of an applet is set by the height and width attributes and cannot be changed by the applet. Many applets need to know their own size. After all you don't want to draw outside the lines. :-)
Retrieving the applet size is
straightforward with the getSize() method. java.applet.Applet inherits this method from java.awt.Component. getSize()
returns a java.awt.Dimension object. A Dimension object has two public int fields, height and width. Below
is a simple applet that prints its own dimensions.
import java.applet.*;
import java.awt.*;
public class SizeApplet extends Applet {
public void paint(Graphics g) {
Dimension appletSize = this.getSize();
int appletHeight = appletSize.height;
int appletWidth = appletSize.width;
g.drawString("This applet is " + appletHeight +
" pixels high by " + appletWidth + " pixels wide.",
15, appletHeight/2);
}
}
Note how the applet's height is used to decide where to draw the text. You'll often want to use the applet's dimensions to determine how to place objects on the page. The applet's width wasn't used because it made more sense to left justify the text rather than center it. In other programs you'll have occasion to use the applet width too.
Passing Parameters to Applets
Parameters are passed to applets
in NAME=VALUE pairs in <PARAM> tags between the opening and closing APPLET tags. Inside the
applet, you read the values passed through the PARAM tags with the getParameter() method of the java.applet.Applet class.
The program below demonstrates this with a generic string drawing applet. The applet parameter "Message" is the string to be drawn.
import java.applet.*;
import java.awt.*;
public class DrawStringApplet extends Applet {
private String defaultMessage = "Hello!";
public void paint(Graphics g) {
String inputFromPage = this.getParameter("Message");
if (inputFromPage == null) inputFromPage = defaultMessage;
g.drawString(inputFromPage, 50, 25);
}
}
You also need an HTML file that references your applet. The following simple HTML file will do:
<HTML><HEAD><TITLE> Draw String </TITLE></HEAD> <BODY>This is the applet:<P><APPLET code="DrawStringApplet.class" width="300" height="50"> <PARAM name="Message" value="Howdy, there!"> This page will be very boring if your browser doesn't understand Java.</APPLET></BODY></HTML> Of course you are free to change "Howdy, there!" to a "message" of your choice. You only need to change the HTML, not the Java source code. PARAMs let you customize applets without changing or recompiling the code.
This applet is very similar to
the HelloWorldApplet. However rather than hardcoding the message to be printed
it's read into the variable inputFromPage from a PARAM in the HTML.
You pass getParameter() a string that names the parameter you want. This string should
match the name of a <PARAM> tag in the HTML page. getParameter() returns
the value of the parameter. All values are passed as strings. If you want to
get another type like an integer, then you'll need to pass it as a string and
convert it to the type you really want.
The <PARAM> HTML tag is also straightforward. It occurs between <APPLET> and </APPLET>. It has two attributes of its own, NAME and VALUE. NAME identifies
which PARAM this is. VALUE is the value of the PARAM as a String. Both should
be enclosed in double quote marks if they contain white space.
An applet is not limited to one PARAM. You can pass as many named PARAMs to an applet as you like. An applet does not necessarily need to use all the PARAMs that are in the HTML. Additional PARAMs can be safely ignored.
Processing An Unknown Number Of Parameters
Most of the time you have a fairly good idea of what parameters will and won't be passed to your applet. However some of the time there will be an undetermined number of parameters. For instance Sun's imagemap applet passes each "hot button" as a parameter. Different imagemaps have different numbers of hot buttons. Another applet might want to pass a series of URL's to different sounds to be played in sequence. Each URL could be passed as a separate parameter.
Or perhaps you want to write an applet that displays several lines of text. While it would be possible to cram all this information into one long string, that's not too friendly to authors who want to use your applet on their pages. It's much more sensible to give each line its own <PARAM> tag. If this is the case, you should name the tags via some predictable and numeric scheme. For instance in the text example the following set of <PARAM> tags would be sensible:
<PARAM name="Line1" value="There once was a man from Japan"><PARAM name="Line2" value="Whose poetry never would scan"><PARAM name="Line3" value="When asked reasons why,"><PARAM name="Line4" value="He replied, with a sigh:"><PARAM name="Line5" value="I always try to get as many syllables into the last line as I can."> The program
below displays this limerick. Lines are accumulated into an array of strings
called poem. A for loop fills the array with the different lines of poetry. There are
101 spaces in the array, but since you won't normally need that many, an if clause
tests to see whether the attempt to get a parameter was successful by checking
to see if the line is null. As soon as one fails, the loop is broken. Once the loop is
finished num_lines is decremented by one because the last line the loop tried to read
wasn't there.
The paint()
method loops through the poem array and prints each String on the screen,
incrementing the y position by fifteen pixels each step so you don't draw one line on
top of the other.
Processing An Unknown Number Of Parameters
import java.applet.*;
import java.awt.*;
public class PoetryApplet extends Applet
{
private String[] poem = new String[101];
private int numLines;
public void init() {
String nextline;
for (numLines = 1; numLines < poem.length; numLines++) {
nextline = this.getParameter("Line" + numLines);
if (nextline == null) break;
poem[numLines] = nextline;
}
numLines--;
}
public void paint(Graphics g) {
int y = 15;
for (int i=1; i <= numLines; i++) {
g.drawString(poem[i], 5, y);
y += 15;
}
}
}
You might think it would be useful to be able to process an arbitrary list of parameters without knowing their names in advance, if nothing else so you could return an error message to the page designer. Unfortunately there's no way to do it in Java 1.0 or 1.1. It may appear in future versions.
Applet Security
The possibility of surfing the Net, wandering across a random page, playing an applet and catching a virus is a fear that has scared many uninformed people away from Java. This fear has also driven a lot of the development of Java in the direction it's gone. Earlier I discussed various security features of Java including automatic garbage collection, the elimination of pointer arithmetic and the Java interpreter. These serve the dual purpose of making the language simple for programmers and secure for users. You can surf the web without worrying that a Java applet will format your hard disk or introduce a virus into your system.
In fact both Java applets and applications are much safer in practice than code written in traditional languages. This is because even code from trusted sources is likely to have bugs. However Java programs are much less susceptible to common bugs involving memory access than are programs written in traditional languages like C. Furthermore the Java runtime environment provides a fairly robust means of trapping bugs before they bring down your system. Most users have many more problems with bugs than they do with deliberately malicious code. Although users of Java applications aren't protected from out and out malicious code, they are largely protected from programmer errors.
Applets implement additional
security restrictions that protect users from malicious code too. This is
accomplished through the java.lang.SecurityManager class. This class is subclassed to provide different security
environments in different virtual machines. Regrettably implementing this
additional level of protection does somewhat restrict the actions an applet can
perform. Let's explore exactly what an applet can and cannot do.
What Can an Applet Do?
An applet can:
- Draw pictures on a web page
- Create a new window and draw in it.
- Play sounds.
- Receive input from the user through the keyboard or the mouse.
- Make a network connection to the server from which it came and can send to and receive arbitrary data from that server.
Anything you can do with these abilities you can do in an applet. An applet cannot:
- Write data on any of the host's disks.
- Read any data from the host's disks without the user's permission. In some environments, notably Netscape, an applet cannot read data from the user's disks even with permission.
- Delete files
- Read from or write to arbitrary blocks of memory, even on a non-memory-protected operating system like the MacOS. All memory access is strictly controlled.
- Make a network connection to a host on the Internet other than the one from which it was downloaded.
- Call the native API directly (though Java API calls may eventually lead back to native API calls).
- Introduce a virus or trojan horse into the host system.
- An applet is not supposed to be able to crash the host system. However in practice Java isn't quite stable enough to make this claim yet.
Who Can an Applet Talk To?
By default an applet can only open network connections to the system from which the applet was downloaded. This system is called the codebase. An applet cannot talk to an arbitrary system on the Internet. Any communication between different client systems must be mediated through the server.
The concern is that if connections to arbitrary hosts were allowed, then a malicious applet might be able to make connections to other systems and launch network based attacks on other machines in an organization's internal network. This would be an especially large problem because the machine's inside a firewall may be configured to trust each other more than they would trust any random machine from the Internet. If the internal network is properly protected by a firewall, this might be the only way an external machine could even talk to an internal machine. Furthermore arbitrary network connections would allow crackers to more easily hide their true location by passing their attacks through several applet intermediaries.
HotJava, Sun's applet viewer, and Internet Explorer (but not Netscape) let you grant applets permission to open connections to any system on the Internet, though this is not enabled by default.
How much CPU time does an applet get?
One of the few legitimate concerns about hostile applets is excessive use of CPU time. It is possible on a non-preemptively multitasking system (specifically the Mac) to write an applet that uses so much CPU time in a tight loop that it effectively locks up the host system. This is not a problem on preemptively multitasking systems like Solaris and Windows NT. Even on those platforms, though, it is possible for an applet to force the user to kill their web browser, possibly losing accumulated bookmarks, email and other work.
It's also possible for an applet to use CPU time for purposes other than the apparent intent of the applet. For instance, a popular applet could launch a Chinese lottery attack on a Unix password file. A popular game applet could launch a thread in the background which tried a random assortment of keys to break a DES encrypted file. If the key was found, then a network connection could be opened to the applet server to send the decrypted key back. The more popular the applet was the faster the key would be found. The ease with which Java applets are decompiled would probably mean that any such applet would be discovered, but there really isn't a way to prevent it from running in the first place.
User Security Issues and Social Engineering
Contrary to popular belief most computer break-ins by external hackers don't happen because of great knowledge of operating system internals and network protocols. They happen because a hacker went digging through a company's garbage and found a piece of paper with a password written on it, or perhaps because they talked to a low-level bureaucrat on the phone, convinced this person they were from the local data processing department and that they needed him or her to change their password to "DEBUG."
This is sort of attack is called social engineering. Java applets introduce a new path for social engineering. For instance imagine an applet that pops up a dialog box that says, "You have lost your connection to the network. Please enter your username and password to reconnect." How many people would blindly enter their username and password without thinking? Now what if the box didn't really come from a lost network connection but from a hacker's applet? And instead of reconnecting to the network (a connection that was never lost in the first place) the username and password was sent over the Internet to the cracker? See the problem?
Preventing Applet Based Social Engineering Attacks
To help prevent this, Java applet windows are specifically labeled as such with an ugly bar that says: "Warning: Applet Window" or "Unsigned Java Applet Window." The exact warning message varies from browser to browser but in any case should be enough to prevent the more obvious attacks on clueless users. It still assumes the user understands what "Unsigned Java Applet Window" means and that they shouldn't type their password or any sensitive information in such a window. User education is the first part of any real security policy.
Content Issues
Some people claim that Java is insecure because it can show the user erotic pictures and play flatulent noises. By this standard the entire web is insecure. Java makes no determination of the content of an applet. Any such determination would require artificial intelligence and computers far more powerful than what we have today.
The Basic Applet Life Cycle
1.
The browser reads the HTML page and finds any <APPLET> tags.
2.
The browser parses the <APPLET> tag to find the CODE and possibly CODEBASE
attribute.
3. The browser downloads the .class file for the applet from the URL found in the last step.
4.
The browser converts the raw bytes downloaded
into a Java class, that is a java.lang.Class object.
5. The browser instantiates the applet class to form an applet object. This requires the applet to have a noargs constructor.
6.
The browser calls the applet's init()
method.
7.
The browser calls the applet's start()
method.
8.
While the applet is running, the browser passes
any events intended for the applet, e.g. mouse clicks, key presses, etc., to
the applet's handleEvent() method. Update events are used to tell the applet that it needs to
repaint itself.
9.
The browser calls the applet's stop()
method.
10.
The browser calls the applet's destroy()
method.
The Basic Applet Life Cycle
All applets have the following four methods:
public void init();public void start();public void stop();public void destroy();They have these methods because their
superclass, java.applet.Applet, has these methods. (It has others too, but right now I just want
to talk about these four.)
In the superclass, these are simply do-nothing methods. For example,
public void init() {}Subclasses may override these methods
to accomplish certain tasks at certain times. For instance, the init()
method is a good place to read parameters that were passed to the applet via <PARAM> tags because it's called exactly once when the applet starts up.
However, they do not have to override them. Since they're declared in the
superclass, the Web browser can invoke them when it needs to without knowing in
advance whether the method is implemented in the superclass or the subclass.
This is a good example of polymorphism.
init(), start(), stop(), and destroy()
The init() method is called exactly once in an applet's life, when the applet
is first loaded. It's normally used to read PARAM tags, start downloading any
other images or media files you need, and set up the user interface. Most
applets have init() methods.
The start()
method is called at least once in an applet's life, when the applet is started
or restarted. In some cases it may be called more than once. Many applets you
write will not have explicit start()methods and will merely inherit
one from their superclass. A start() method is often used to start
any threads the applet will need while it runs.
The stop()
method is called at least once in an applet's life, when the browser leaves the
page in which the applet is embedded. The applet's start()
method will be called if at some later point the browser returns to the page
containing the applet. In some cases the stop() method may be
called multiple times in an applet's life. Many applets you write will not have
explicit stop()methods and will merely inherit one from their superclass. Your
applet should use the stop() method to pause any running threads. When your applet is stopped,
it should not use any
CPU cycles.
The destroy()
method is called exactly once in an applet's life, just before the browser
unloads the applet. This method is generally used to perform any final
clean-up. For example, an applet that stores state on the server might send
some data back to the server before it's terminated. many applets will not have
explicit destroy() methods and just inherit one from their superclass.
For example, in a video applet,
the init() method might draw the controls and start loading the video file.
The start() method would wait until the file was loaded, and then start playing
it. The stop() method would pause the video, but not rewind it. If the start()
method were called again, the video would pick up where it left off; it would
not start over from the beginning. However, if destroy() were called
and then init(), the video would start over from the beginning.
In the JDK's appletviewer,
selecting the Restart menu item calls stop() and then start().
Selecting the Reload menu item calls stop(), destroy(),
and init(), in that order. (Normally the byte codes will also be reloaded and
the HTML file reread though Netscape has a problem with this.)
The applet start() and stop()
methods are not related to the similarly named methods in the java.lang.Thread class.
Your own code may occasionally
invoke start() and stop(). For example, it's customary to stop playing an animation when the
user clicks the mouse in the applet and restart it when they click the mouse
again.
Your own code can also invoke init() and destroy(),
but this is normally a bad idea. Only the environment should call init() and destroy().
The Coordinate System
Java uses the standard, two-dimensional, computer graphics coordinate system. The first visible pixel in the upper left-hand corner of the applet canvas is (0, 0). Coordinates increase to the right and down.
Graphics Objects
In Java all drawing takes place via a Graphics
object. This is an instance of the class java.awt.Graphics.
Initially the Graphics
object you use will be the one passed as an argument to an applet's paint()
method. Later you'll see other Graphics objects too. Everything you
learn today about drawing in an applet transfers directly to drawing in other
objects like Panels, Frames, Buttons, Canvases and more.
Each Graphics
object has its own coordinate system, and all the methods of Graphics
including those for drawing Strings, lines, rectangles, circles, polygons and
more. Drawing in Java starts with particular Graphics object. You
get access to the Graphics object through the paint(Graphics g) method of your applet.
Each draw method call will look like g.drawString("Hello World", 0, 50) where g is the particular Graphics object with which you're
drawing.
For convenience's sake in this
lecture the variable g will always refer to a preexisting object of the Graphics
class. As with any other method you are free to use some other name for the
particular Graphics context, myGraphics or appletGraphics perhaps.
Drawing Lines
Drawing straight lines with Java is easy. Just call
g.drawLine(x1, y1, x2, y2) where (x1, y1) and
(x2, y2) are the endpoints of your lines and g is the Graphics
object you're drawing with.
This program draws a line diagonally across the applet.
import java.applet.*;
import java.awt.*;
public class SimpleLine extends Applet {
public void paint(Graphics g) {
g.drawLine(0, 0, this.getSize().width, this.getSize().height);
}
}
Drawing Rectangles
Drawing rectangles is simple.
Start with a Graphics object g and call its drawRect() method:
public void drawRect(int x, int y, int width, int
height)
As the variable names suggest,
the first int is the left hand side of the rectangle, the second is the top of
the rectangle, the third is the width and the fourth is the height. This is in
contrast to some APIs where the four sides of the rectangle are given.
This uses drawRect() to draw a rectangle around
the sides of an applet.
import java.applet.*;
import java.awt.*;
public class RectangleApplet extends Applet {
public void paint(Graphics g) {
g.drawRect(0, 0, this.getSize().width - 1, this.getSize().height - 1);
}
}
Remember that getSize().width is the width of the applet and getSize().height is its
height.
Why was the rectangle drawn only
to getSize().height-1 and getSize().width-1?
Remember that the upper left hand corner of the applet starts at (0, 0), not at (1, 1). This means that a 100 by 200 pixel applet includes the points with x coordinates between 0 and 99, not between 0 and 100. Similarly the y coordinates are between 0 and 199 inclusive, not 0 and 200.
There is no separate drawSquare()
method. A square is just a rectangle with equal length sides, so to draw a
square call drawRect() and pass the same number for both the height and width
arguments.
Filling Rectangles
The drawRect()
method draws an open rectangle, a box if you prefer. If you want to draw a
filled rectangle, use the fillRect() method. Otherwise the syntax is identical.
This program draws a filled square in the center of the applet. This requires you to separate the applet width and height from the rectangle width and height. Here's the code:
import java.applet.*;
import java.awt.*;
public class FillAndCenter extends Applet {
public void paint(Graphics g) {
int appletHeight = this.getSize().height;
int appletWidth = this.getSize().width;
int rectHeight = appletHeight/3;
int rectWidth = appletWidth/3;
int rectTop = (appletHeight - rectHeight)/2;
int rectLeft = (appletWidth - rectWidth)/2;
g.fillRect(rectLeft, rectTop, rectWidth-1, rectHeight-1);
}
}
Clearing Rectangles
It is also possible to clear a rectangle that you've drawn. The syntax is exactly what you'd expect:
public
abstract void clearRect(int x, int y, int width, int height)
This program uses clearRect() to blink a
rectangle on the screen.
import java.applet.*;
import java.awt.*;
public class Blink extends Applet {
public void paint(Graphics g) {
int appletHeight = this.getSize().height;
int appletWidth = this.getSize().width;
int rectHeight = appletHeight/3;
int rectWidth = appletWidth/3;
int rectTop = (appletHeight - rectHeight)/2;
int rectLeft = (appletWidth - rectWidth)/2;
for (int i=0; i < 1000; i++) {
g.fillRect(rectLeft, rectTop, rectWidth-1, rectHeight-1);
g.clearRect(rectLeft, rectTop, rectWidth-1, rectHeight-1);
}
}
}
This is not how you should do animation in practice, but this is the best we can do until we introduce threads.
Ovals and Circles
Java has methods
to draw outlined and filled ovals. As you'd probably guess these methods are
called drawOval() and fillOval() respectively. As you might not guess they take identical arguments
to drawRect() and fillRect(), i.e.
public void drawOval(int left, int top, int width, int height) public void fillOval(int left, int top, int width, int height)Instead of the dimensions of the oval itself, the dimensions of the smallest rectangle which can enclose the oval are specified. The oval is drawn as large as it can be to touch the rectangle's edges at their centers. This picture may help:

The arguments to drawOval()
are the same as the arguments to drawRect(). The first int is the
left hand side of the enclosing rectangle, the second is the top of the
enclosing rectangle, the third is the width and the fourth is the height.
There is no special method to draw a circle. Just draw an oval inside a square.
Java also has methods to draw
outlined and filled arcs. They're similar to drawOval() and fillOval()
but you must also specify a starting and ending angle for the arc. Angles are
given in degrees. The signatures are:
public void drawArc(int left, int top, int width, int height, int startangle, int stopangle)public void fillArc(int left, int top, int width, int height, int startangle, int stopangle)The rectangle is filled with an arc of the largest circle that could be enclosed within it. The location of 0 degrees and whether the arc is drawn clockwise or counter-clockwise are currently platform dependent.
Bullseye
This is a simple applet which draws a series of filled, concentric circles alternating red and white, in other words a bullseye.
import java.applet.*;
import java.awt.*;
public class Bullseye extends Applet {
public void paint(Graphics g) {
int appletHeight = this.getSize().height;
int appletWidth = this.getSize().width;
for (int i=8; i >= 0; i--) {
if ((i % 2) == 0) g.setColor(Color.red);
else g.setColor(Color.white);
// Center the rectangle
int rectHeight = appletHeight*i/8;
int rectWidth = appletWidth*i/8;
int rectLeft = appletWidth/2 - i*appletWidth/16;
int rectTop = appletHeight/2 - i*appletHeight/16;
g.fillOval(rectLeft, rectTop, rectWidth, rectHeight);
}
}
}
The .class file that draws this image is only 684 bytes. The equivalent GIF image is 1,850 bytes, almost three times larger.
Almost all the work in this applet consists of centering the enclosing rectangles inside the applet. The lines in bold do that. The first two lines just set the height and the width of the rectangle to the appropriate fraction of the applet's height and width. The next two lines set the position of the upper left hand corner. Once the rectangle is positioned, drawing the oval is easy.
Polygons
In Java rectangles are defined by the position of their upper left hand corner, their height, and their width. However it is implicitly assumed that there is in fact an upper left hand corner. Not all rectangles have an upper left hand corner. For instance consider the rectangle below.
Where is its upper left hand corner? What's been assumed so far is that the sides of the rectangle are parallel to the coordinate axes. You can't yet handle a rectangle that's been rotated at an arbitrary angle.
There are some other things you
can't handle either, triangles, stars, rhombuses, kites, octagons and more. To
take care of this broad class of shapes Java has a Polygon
class.
Polygons are defined by their
corners. No assumptions are made about them except that they lie in a 2-D
plane. The basic constructor for the Polygon class is
public
Polygon(int[] xpoints, int[] ypoints, int npoints)
xpoints is
an array that contains the x coordinates of the polygon. ypoints is
an array that contains the y coordinates. Both should have the length npoints.
Thus to construct a 3-4-5 right triangle with the right angle on the origin you
would type
int[] xpoints = {0, 3, 0};int[] ypoints = {0, 0, 4};Polygon myTriangle = new Polygon(xpoints, ypoints, 3);To actually draw the polygon you use java.awt.Graphics's drawPolygon(Polygon
p) method within your paint()
method like this:
g.drawPolygon(myTriangle);You can pass the arrays and number of
points directly to the drawPolygon() method if you prefer:
g.drawPolygon(xpoints, ypoints, xpoints.length);There's also an overloaded fillPolygon() method. The syntax is exactly as you expect:
g.fillPolygon(myTriangle); g.fillPolygon(xpoints, ypoints, xpoints.length());Java automatically closes the polygons it draws. That is it draws polygons that look like the one on the right rather than the one on the left.
If you don't want your polygons
to be closed, you can draw a polyline instead with the Graphics
class's drawPolyline() method
public abstract void drawPolyline(int xPoints[], int yPoints[], int nPoints)Loading Images
Polygons, ovals, lines and text cover a lot of ground. The remaining graphic object you need is an image. Images in Java are bitmapped GIF or JPEG files that can contain pictures of just about anything. You can use any program at all to create them as long as that program can save in GIF or JPEG format.
Images displayed by Java applets are retrieved from the web via a URL that points to the image file. An applet that displays a picture must have a URL to the image its going to display. Images can be stored on a web server, a local hard drive or anywhere else the applet can point to via a URL. Make sure you put your images somewhere the person viewing the applet can access them. A file URL that points to your local hard drive may work while you're developing an applet, but it won't be of much use to someone who comes in over the web.
Typically you'll put images in the same directory as either the applet or the HTML file. Though it doesn't absolutely have to be in one of these two locations, storing it there will probably be more convenient. Put the image with the applet .class file if the image will be used for all instances of the applet. Put the applet with the HTML file if different instances of the applet will use different images. A third alternative is to put all the images in a common location and use PARAMs in the HTML file to tell Java where the images are.
If you know the exact URL for the
image you wish to load, you can load it with the getImage() method:
URL imageURL = new URL("http://www.prenhall.com/logo.gif");java.awt.Image img = this.getImage(imageURL);You can compress this into one line as follows
Image img = this.getImage(new URL("http://www.prenhall.com/logo.gif"));The getImage()
method is provided by java.applet.Applet. The URL class is provided by java.net.URL. Be sure
to import it.
Code and Document Bases
If you don't
know the exact URL of the image, but you do know its name and that it's in the
same directory as the applet, you can use an alternate form of getImage()
that takes a URL and a filename. Use the applet's getCodeBase() method to return the URL to the applet directory like this:
Image img = this.getImage(this.getCodeBase(), "test.gif");The getCodeBase() method returns a URL object that points to the directory
where the applet came from.
Finally if the image file is
stored in the same directory as the HTML file, use the same getImage()
method but pass it getDocumentBase() instead. This returns a URL that points at the directory which
contains the HTML page in which the applet is embedded.
Image img = this.getImage(this.getDocumentBase(), "test.gif"); If an image is loaded from the Internet, it may take some time for it to be fully downloaded. Most of the time you don't need to worry about this. You can draw the Image as soon as you've connected it to a URL using one of the above methods. Java will update it as more data becomes available without any further intervention on your part.
Load all the images your applet
needs in the init() method. In particular you do not want to load them in the paint()
method. If you do they will be reloaded every time your applet repaints itself,
and applet performance will be abysmal.
Drawing Images at Actual Size
Once the image
is loaded draw it in the paint() method using the drawImage() method like this
g.drawImage(img, x, y, io)img is a member of the Image class
which you should have already loaded in your init() method. x is the x
coordinate of the upper left hand corner of the image. y is the y
coordinate of the upper left hand corner of the image. io is a
member of a class which implements the ImageObserver interface.
The ImageObserver interface is how Java handles the asynchronous updating of an Image
when it's loaded from a remote web site rather than directly from the hard
drive. java.applet.Applet implements ImageObserver so for
now just pass the keyword this to drawImage() to indicate that the current applet is the ImageObserver that should be used.
A paint() method that
does nothing more than draw an Image starting at the upper left hand corner of
the applet may look like this
public void paint(Graphics g) { g.drawImage(img, 0, 0, this);}This draws the image at the actual size of the picture.
Scaling Images
You can scale an
image into a particular rectangle using this version of the drawImage()
method:
public boolean drawImage(Image img, int x, int y, int width, int height, ImageObserver io)
width and height
specify the size of the rectangle to scale the image into. All other arguments
are the same as before. If the scale is not in proportion to the size of the
image, it can end up looking quite squashed.
To avoid disproportionate
scaling use the image's getHeight() and getWidth() methods to determine the actual size. Then scale appropriately. For
instance this is how you would draw an Image scaled by one quarter in each
dimension:
g.drawImage(img, 0, 0, img.getWidth(this)/4,
img.getHeight(this)/4, this);
This program reads a GIF file in the same directory as the HTML file and displays it at a specified magnification. The name of the GIF file and the magnification factor are specified via PARAMs.
import java.awt.*;
import java.applet.*;
public class MagnifyImage extends Applet {
private Image image;
private int scaleFactor;
public void init() {
String filename = this.getParameter("imagefile");
this.image = this.getImage(this.getDocumentBase(), filename);
this.scaleFactor = Integer.parseInt(this.getParameter("scalefactor"));
}
public void paint (Graphics g) {
int width = this.image.getWidth(this);
int height = this.image.getHeight(this);
scaledWidth = width * this.scaleFactor;
scaledHeight = height * this.scaleFactor;
g.drawImage(this.image, 0, 0, scaledWidth, scaledHeight, this);
}
}
This applet is straightforward.
The init() method reads two PARAMs, one the name of the image file, the other
the magnification factor. The paint() method calculates the scale and
then draws the image.
Color
Color is a class
in the AWT. Individual colors like red or mauve are instances of this class, java.awt.Color. Be sure to import it if you want to use other than the default
colors. You create new colors using the same RGB triples that you use to set
background colors on web pages. However you use decimal numbers instead of the
hex values used by the bgcolor tag. For example medium gray is Color(127, 127, 127).
Pure white is Color(255,
255, 255). Pure red is (255, 0, 0)
and so on. As with any variable you should give your colors descriptive names.
For instance
Color medGray = new Color(127, 127, 127);Color cream = new Color(255, 231, 187);Color lightGreen = new Color(0, 55, 0);A few of the most common colors are available by name. These are
·
Color.black
Color.blueColor.cyanColor.darkGrayColor.grayColor.greenColor.lightGrayColor.magentaColor.orangeColor.pinkColor.redColor.whiteColor.yellow
Color
Color is not a
property of a particular rectangle, string or other thing you may draw. Rather
color is a part of the Graphics object that does the drawing. To change colors you change the color
of your Graphics object. Then everything you draw from that point forward will be in
the new color, at least until you change it again.
When an applet starts running
the color is set to black by default. You can change this to red by calling g.setColor(Color.red). You can change it back to black by calling g.setColor(Color.black). The following code fragment shows how you'd draw a pink String
followed by a green one:
g.setColor(Color.pink);g.drawString("This String is pink!", 50, 25);g.setColor(Color.green);g.drawString("This String is green!", 50, 50); Remember
everything you draw after the last line will be drawn in green. Therefore
before you start messing with the color of the pen its a good idea to make sure
you can go back to the color you started with. For this purpose Java provides
the getColor() method. You use it like follows:
Color oldColor = g.getColor();g.setColor(Color.pink);g.drawString("This String is pink!", 50, 25);g.setColor(Color.green);g.drawString("This String is green!", 50, 50);g.setColor(oldColor);System Colors
In Java 1.1, the
java.awt.SystemColor class is a subclass of java.awt.Color which
provides color constants that match native component colors. For example, if
you wanted to make the background color of your applet, the same as the
background color of a window, you might use this init() method:
public void paint (Graphics g) { g.setColor(SystemColor.control); g.fillRect(0, 0, this.getSize().width, this.getSize().height);}
These are the available system colors:
·
SystemColor.desktop
// Background color of desktop
·
SystemColor.activeCaption
// Background color for captions
·
SystemColor.activeCaptionText
// Text color for captions
·
SystemColor.activeCaptionBorder
// Border color for caption text
·
SystemColor.inactiveCaption
// Background color for inactive captions
·
SystemColor.inactiveCaptionText
// Text color for inactive captions
·
SystemColor.inactiveCaptionBorder
// Border color for inactive captions
·
SystemColor.window
// Background for windows
·
SystemColor.windowBorder
// Color of window border frame
·
SystemColor.windowText
// Text color inside windows
·
SystemColor.menu
// Background for menus
·
SystemColor.menuText
// Text color for menus
·
SystemColor.text
// background color for text
·
SystemColor.textText
// text color for text
·
SystemColor.textHighlight
// background color for highlighted text
·
SystemColor.textHighlightText
// text color for highlighted text
·
SystemColor.control
// Background color for controls
·
SystemColor.controlText
// Text color for controls
·
SystemColor.controlLtHighlight
// Light highlight color for controls
·
SystemColor.controlHighlight
// Highlight color for controls
·
SystemColor.controlShadow
// Shadow color for controls
·
SystemColor.controlDkShadow
// Dark shadow color for controls
·
SystemColor.inactiveControlText
// Text color for inactive controls
·
SystemColor.scrollbar
// Background color for scrollbars
·
SystemColor.info
// Background color for spot-help text
·
SystemColor.infoText
// Text color for spot-help text
Fonts
You've already seen one example
of drawing text in the HelloWorldApplet program of the last chapter. You call the drawString()
method of the Graphics object. This method is passed the String you want to draw
as well as an x and y coordinate. If g is a Graphics
object, then the syntax is
g.drawString(String s, int x, int y)
The String is
simply the text you want to draw. The two integers are the x and y coordinates
of the lower left-hand corner of the String. The String will
be drawn above and to the right of this point. However letters with descenders
like y and p may have their descenders drawn below the line.
Until now all the applets have used the default font, probably some variation of Helvetica though this is platform dependent. However unlike HTML Java does allow you to choose your fonts. Java implementations are guaranteed to have a serif font like Times that can be accessed with the name "Serif", a monospaced font like courier that can be accessed with the name "Mono", and a sans serif font like Helvetica that can be accessed with the name "SansSerif".
The following applet lists the
fonts available on the system it's running on. It does this by using the getFontList() method from java.awt.Toolkit. This method returns an array of strings containing the names of
the available fonts. These may or may not be the same as the fonts installed on
your system. It's implementation dependent whether or not all the fonts a
system has are available to the applet.
import java.awt.*;
import java.applet.*;
public class FontList extends Applet {
private String[] availableFonts;
public void init () {
Toolkit t = Toolkit.getDefaultToolkit();
availableFonts = t.getFontList();
}
public void paint(Graphics g) {
for (int i = 0; i < availableFonts.length; i++) {
g.drawString(availableFonts[i], 5, 15*(i+1));
}
}
}
Choosing Font Faces and Sizes
Choosing a font face is easy.
First you create a new Font object. Then you call g.setFont(Font f). To
instantiate a Font object use this constructor:
public
Font(String name, int style, int size)
name is the name of the font family, e.g. "Serif",
"SansSerif", or "Mono".
size is the size of the font in points. In computer graphics a point is
considered to be equal to one pixel. 12 points is a normal size font. 14 points
is probably better on most computer displays. Smaller point sizes look good on
paper printed with a high resolution printer, but not in the lower resolutions
of a computer monitor.
style is an mnemonic constant from java.awt.Font that
tells whether the text will be bold, italic or plain. The three constants are Font.PLAIN, Font.BOLD,
and Font.ITALIC. The program below prints each font in its own face and 14 point
bold.
import java.applet.*;
import java.awt.*;
public class FancyFontList extends Applet {
private String[] availableFonts;
public void init () {
Toolkit t = Toolkit.getDefaultToolkit();
availableFonts = t.getFontList();
}
public void paint(Graphics g) {
for (int i = 0; i < availableFonts.length; i++) {
Font f = new Font(availableFonts[i], Font.BOLD, 14);
g.setFont(f);
g.drawString(availableFonts[i], 5, 15*i + 15);
}
}
}
FontMetrics
No word wrapping is done when
you draw a string in an applet, even if you embed newlines in the string with \n. If you
expect that a string may not fit in the applet, you should probably use a
TextArea Component instead. You'll learn about text areas and other AWT
Components next class. However there are times when you will need to concern
yourself with how much space a particular string will occupy. You find this out
with a FontMetrics object. FontMetrics allow you to determine the height, width or other useful
characteristics of a particular string, character, or array of characters in a
particular font.
As an example the following program expands on the DrawString applet. Previously text would run off the side of the page if the string was too long to fit in the applet. Now the string will wrap around if necessary.
In order to tell where and
whether to wrap the String, you need to measure the string, not its length in characters which
can be variable but rather its width and height in pixels. Measurements of this
sort on strings clearly depend on the font that's used to draw the string. All
other things being equal a 14 point string will be wider than the same string
in 12 or 10 point type.
To measure character and string
sizes you need to look at the FontMetrics of the current font. To get
a FontMetrics object for the current Graphics object you use
the java.awt.Graphics.getFontMetrics() method. From java.awt.FontMetrics you'll need fm.stringWidth(String
s) to return the width of a string in a
particular font, and fm.getLeading() to get the appropriate line spacing for the font. There are many
more methods in java.awt.FontMetrics that let you measure the heights and widths of specific characters
as well as ascenders, descenders and more, but these three methods will be
sufficient for this program.
Finally you'll need the StringTokenizer class from java.util to split up the String into individual words. However
you do need to be careful lest some annoying beta tester (or, worse yet, end
user) tries to see what happens when they feed the word
antidisestablishmentarianism or supercalifragilisticexpialidocious into an
applet that's 50 pixels across.
import java.applet.*;
import java.awt.*;
import java.util.*;
public class WrapTextApplet extends Applet {
private String inputFromPage;
public void init() {
this.inputFromPage = this.getParameter("Text");
}
public void paint(Graphics g) {
int line = 1;
int linewidth = 0;
int margin = 5;
StringBuffer sb = new StringBuffer();
FontMetrics fm = g.getFontMetrics();
StringTokenizer st = new StringTokenizer(inputFromPage);
while (st.hasMoreTokens()) {
String nextword = st.nextToken();
if (fm.stringWidth(sb.toString() + nextword) + margin <
this.getSize().width) {
sb.append(nextword);
sb.append(' ');
}
else if (sb.length() == 0) {
g.drawString(nextword, margin, line*fm.getHeight());
line++;
}
else {
g.drawString(sb.toString(), margin, line*fm.getHeight());
sb = new StringBuffer(nextword + " ");
line++;
}
}
if (sb.length() > 0) {
g.drawString(sb.toString(), margin, line*fm.getHeight());
line++;
}
}
}
Components
Components are graphical user interface (GUI) widgets like checkboxes, menus, windows, buttons, text fields, applets, and more.
In Java all
components are subclasses of java.awt.Component. Subclasses of Component
include
·
Canvas
·
TextField
·
TextArea
·
Label
·
List
·
Button
·
Choice
·
Checkbox
·
Frame
·
JButton
·
JLabel
·
JComboBox
·
JMenu
Components paint themselves.
Labels
The simplest component is java.awt.Label. A Label is one line of read-only text, pretty much perfect for a Hello
World applet.
import java.applet.*;
import java.awt.*;
public class HelloContainer extends Applet {
public void init() {
Label l;
l = new Label("Hello Container");
this.add(l);
}
}
As usual you begin by importing
the classes you need. In this case you need only two, java.applet.Applet and java.awt.Label and lines 1 and 2 import them.
Line 4 declares the class in the
usual way as an extension of Applet. The class has a single method, init().
Line 6 starts the init()
method. The init() method does three things. First line 7 declares that l is a Label. Then l is
instantiated with the Label(String
s) constructor in Line 8. Finally l is added
to the layout in line 9. Components don't have to be added to the layout in the
init() method nor do they need to be instantiated there, but it's often
convenient to do so.
Three Steps to Adding a Component
public void init() { Label l; l = new Label("Hello Container"); this.add(l); } The key thing to remember about adding components to the applet is the three steps:
1. Declare the component
2. Initialize the component
3. Add the component to the layout.
The first two steps must be performed when creating an instance of any class so it's really only the third that's new.
You can often combine the three steps into one like this
this.add(new
Label("Hello Container"));
The disadvantage to this
shortcut is that you no longer have a variable which references the Label. Thus
you can't easily access the Label later. However labels are fairly
constant things, so you're unlikely to want to access it anyway.
Where's
the paint() Method?
You may have
noticed something funny about the previous applet. There's no paint()
method! And yet the text gets drawn on the screen anyhow. How does this happen?
Components know how to paint
themselves. When a container like an applet is repainted it not only calls its
own paint() method, it calls the paint() method for all
the components it contains.
java.awt.Label has its own paint() method which knows how to paint() itself. The
short of it is that you don't need to worry about painting components unless
you create your own component classes or modify the appearance of the system
supplied components.
Label Methods
Labels are
simple objects which have only a few constructors and methods of their own,
separate from the general methods of java.awt.Component
(which java.awt.Label subclasses).
public final static int LEFTpublic final static int CENTERpublic final static int RIGHTpublic Label()public Label(String text)public Label(String text, int alignment)public void addNotify()public int getAlignment()public synchronized void setAlignment(int alignment)public String getText()public synchronized void setText(String text) You've already
seen the basic constructor for a Label. You can also
create a Label with no text at all using the Label() constructor
with no arguments. There's little to no reason to do this. You can also define
that a Label is right, left, or center aligned by passing the approriate
constant to the constructor:
Label center = new Label("This label is centered", Label.CENTER);Label left = new Label("This label is left-aligned", Label.LEFT);Label right = new Label("This label is right-aligned", Label.RIGHT);The two methods
of java.awt.Label which you may occasionally have reason to call are getText()
and setText(String s). These allow you to retrieve and change the text of a Label while
the applet is running. Given a Label l here is how they might be used
String s = l.getText();l.setText("Here's the new label");Component Methods
Although labels
don't have many methods of their own, they do inherit a number of useful
methods from the superclass, java.awt.Component. An incomplete list
of these methods includes:
public String getName()public void setName(String name)public boolean isVisible()public boolean isShowing()public boolean isEnabled()public void setEnabled(boolean b)public void setVisible(boolean b)public Color getForeground()public void setForeground(Color c)public Color getBackground()public void setBackground(Color c)public Font getFont()public synchronized void setFont(Font f)public Locale getLocale()public void setLocale(Locale l)public ColorModel getColorModel()public Point getLocation()public Point getLocationOnScreen()public void setLocation(int x, int y)public void setLocation(Point p)public Dimension getSize()public void setSize(int width, int height)public Rectangle getBounds()public void setBounds(int x, int y, int width,int height)public void setBounds(Rectangle r)public Dimension getPreferredSize()public Dimension getMinimumSize()public Dimension getMaximumSize()public float getAlignmentX()public float getAlignmentY()public FontMetrics getFontMetrics(Font font)public synchronized void setCursor(Cursor cursor)public Cursor getCursor()public void paint(Graphics g)public void update(Graphics g)public void paintAll(Graphics g)public void repaint()public void repaint(long tm)public void repaint(int x, int y, int width,int height)public void repaint(long tm, int x, int y, int width,int height)public void print(Graphics g)public void printAll(Graphics g)public boolean contains(int x, int y)public boolean contains(Point p)public Component getComponentAt(int x, int y)public Component getComponentAt(Point p)These methods are also available in all
other subclasses of component we'll discuss including Applet, Button, TextField, TextArea, List, Checkbox,
and so forth.
Using Component Methods
Let's suppose, for example, you want to write an applet that uses a Label whose text is 24 point, SansSerif, bold and blue and whose background color is yellow.
import java.awt.*;
import java.applet.*;
public class CubScouts extends Applet {
public void init() {
Label cubScouts = new Label("Cub Scouts!");
cubScouts.setForeground(Color.blue);
cubScouts.setBackground(Color.yellow);
cubScouts.setFont(new Font("Sans", Font.BOLD, 24));
this.add(cubScouts);
}
}
Using Component Methods in an Applet
Since applets
are subclasses of java.awt.Component they also have all these methods. You can use these methods to set
the default values of color, font, and so on used by the Graphics
object passed to the paint() method. For example, Here's another way to write
an applet that uses a Label whose text is 24 point, SansSerif, bold and blue
and whose background color is yellow.
import java.awt.*;
import java.applet.*;
public class CubScoutApplet extends Applet {
int height = 0;
public void init() {
this.setForeground(Color.blue);
this.setBackground(Color.yellow);
this.setFont(new Font("Sans", Font.BOLD, 24));
this.height = this.getSize().height;
}
public void paint(Graphics g) {
g.drawString("Cub Scouts!", 5, height/2);
}
}
The main difference is that this sets the background of the entire applet to yellow, not just the label. Furthermore, the properties of the applet will be inherited by any components the applet contains.
Buttons
Buttons are instances
of the java.awt.Button class, a subclass of java.awt.Component.
Buttons are created with the Button(String label) constructor. This
creates a new button with the label printed on it. Then you add the button to
the layout. For example,
Button b; b = new Button("My First Button");this.add(b);If this looks familiar it should. It's almost identical to the syntax for creating a new label. You'll use this syntax over and over again for all the different user interface components including text fields, text areas, scrollbars, canvases and more. The only thing that changes is the constructor.
The shortcut is the same also. The three lines are often combined into the single line
add(new
Button("My First Button"));
Here's a very simple applet with a Button:
import java.applet.*;
import java.awt.*;
public class FirstButton extends Applet {
public void init () {
this.add(new Button("My First Button"));
}
}
Button Actions
Unlike labels,
buttons do things when you press them. When the mouse is clicked on a Button, the Button fires
an ActionEvent. To be ready to respond to this event you must register an ActionListener with the Button. For example,
Button beep = new Button("Beep"); add(beep); // add the button to the layout beep.addActionListener(myActionListener); // assign the button a listenerHere myActionListener is a reference to an object which implements the java.awt.event.ActionListener interface. This interface specifies a single method, actionPerformed():
public abstract void
actionPerformed(ActionEvent e)
The ActionListener object does something as a result of the ActionEvent
the button press fired. For example, the following class beeps when it gets an ActionEvent:
import java.awt.*;
import java.awt.event.*;
public class BeepAction implements ActionListener {
public void actionPerformed(ActionEvent e) {
Toolkit.getDefaultToolkit().beep();
}
}
An Example of an Applet with a Button
Here's an applet that puts up a single Button
labeled "Beep." The Button is added to the applet. Then a BeepAction
object is set to handle the Button's ActionEvents with the addActionListener() method.
import java.applet.*;
import java.awt.*;
import java.awt.event.*;
public class BeepApplet extends Applet {
public void init () {
// Construct the button
Button beep = new Button("Beep");
// add the button to the layout
this.add(beep);
// specify that action events sent by this
// button should be handled by a new BeepAction object
beep.addActionListener(new BeepAction());
}
}
Alternate Patterns for Events
Since ActionListener is an interface and not a class, it can be implemented wherever is
convenient. For example, an applet can handle its own events like this:
import java.applet.*;
import java.awt.*;
import java.awt.event.*;
public class BeepApplet extends Applet implements ActionListener {
public void init () {
// Construct the button
Button beep = new Button("Beep");
// add the button to the layout
this.add(beep);
// specify that action events sent by this
// button should be handled by the applet itself
beep.addActionListener(this);
}
public void actionPerformed(ActionEvent e) {
Toolkit.getDefaultToolkit().beep();
}
}
The main benefit of this event model is that the GUI can be separated from the code.
Multiple ActionListeners
You aren't limited to just one listener per event, either. For example, to beep five times when the button is pressed, use such code:
import java.applet.*;
import java.awt.*;
import java.awt.event.*;
public class BeepFiveApplet extends Applet {
public void init () {
// Construct the button
Button beep = new Button("Beep");
// add the button to the layout
this.add(beep);
// specify that action events sent by this
// button should be handled by a new BeepAction object
beep.addActionListener(new BeepAction());
beep.addActionListener(new BeepAction());
beep.addActionListener(new BeepAction());
beep.addActionListener(new BeepAction());
beep.addActionListener(new BeepAction());
}
}
Button Methods
Buttons are
simple objects. Most of the time all you need to do is add them to the layout
and add an ActionListener. The following methods are also available:
public void addNotify()public String getLabel()public synchronized void setLabel(String label)public void setActionCommand(String command)public String getActionCommand()public void addActionListener(ActionListener l)public void removeActionListener(ActionListener l)addNotify() creates the
Button's peer object, that is the native widget that has the appearance of a
Windows button or a Mac button or a Motif button or whatever. It is extremely
rare to call this directly.
The getLabel() and
setLabel(String s) methods allow you to retrieve and change the text of the button
while the applet is running. Given a Button b, here is how
they might be used
String s = b.getLabel();b.setLabel("Here's the new label");Note that despite the suggestive name, getLabel()
returns a String, not a Label.
The setActionCommand() and getActionCommand() methods modify the command string sent along with the ActionEvent.
By default this is the label of the button, but it can be changed. For
instance, you could use this as a way to pass the number of times the BeepApplet
should beep
Finally addActionListener() registers another object as one which should receive ActionEvents
fired by the Button. removeActionListener() deregisters the ActionListener object l so it will
no longer receive action events fired by this Button.
Action Commands
The setActionCommand() and getActionCommand() methods modify the command string sent along with the ActionEvent.
By default this is the label of the button, but it can be changed. For
instance, you could use this as a way to pass the number of times the BeepApplet
should beep
import java.applet.*;
import java.awt.*;
import java.awt.event.*;
public class BeepFiveApplet extends Applet {
public void init () {
// Construct the button
Button beep = new Button("Beep");
// add the button to the layout
this.add(beep);
// specify that action events sent by this
// button should be handled by the applet itself
beep.addActionListener(new MultiBeepAction());
beep.setActionCommand("5");
}
}
class MultiBeepAction implements ActionListener {
public void actionPerformed(ActionEvent ae) {
int n;
try {
n = Integer.parseInt(ae.getActionCommand());
}
catch (NumberFormatException e) {
n = 1;
}
Toolkit tk = Toolkit.getDefaultToolkit();
for (int i = 0; i < n; i++) tk.beep();
}
}
Multiple Buttons
Of course it's
possible to have more than one button in an applet. Each button that's going to
cause an action to be taken, needs to register at least one ActionListener object. Different buttons can register different ActionListener objects or they can share. ActionListeners for
buttons can be of the same or different classes. If two buttons register the
same ActionListener, you normally use the action command to distinguish between them.
import java.applet.*;
import java.awt.*;
import java.awt.event.*;
public class TwoButtons extends Applet {
public void init() {
// Construct the button
Button beep = new Button("Beep Once");
MultiBeepAction mba = new MultiBeepAction();
// add the button to the layout
this.add(beep);
beep.addActionListener(mba);
beep.setActionCommand("1");
Button beepTwice = new Button("Beep Twice");
beepTwice.addActionListener(mba);
beepTwice.setActionCommand("2");
this.add(beepTwice);
}
}
class MultiBeepAction implements ActionListener {
public void actionPerformed(ActionEvent ae) {
int n;
try {
n = Integer.parseInt(ae.getActionCommand());
}
catch (NumberFormatException e) {
n = 1;
}
Toolkit tk = Toolkit.getDefaultToolkit();
for (int i = 0; i < n; i++) tk.beep();
}
}
Inner Classes as Event Listeners
It is common to make an event listener class an inner class. This is most commonly used with custom component subclasses that want to handle their own events.
import java.applet.*;
import java.awt.*;
import java.awt.event.*;
public class TwoButtons extends Applet {
public void init() {
// Construct the button
Button beep = new Button("Beep Once");
MultiBeepAction mba = new MultiBeepAction();
// add the button to the layout
this.add(beep);
// specify that action events sent by this
// button should be handled by the MultiBeepAction mba
beep.addActionListener(mba);
beep.setActionCommand("1");
Button beepTwice = new Button("Beep Twice");
beepTwice.addActionListener(mba);
beepTwice.setActionCommand("2");
this.add(beepTwice);
}
class MultiBeepAction implements ActionListener {
public void actionPerformed(ActionEvent ae) {
int n;
try {
n = Integer.parseInt(ae.getActionCommand());
}
catch (NumberFormatException e) {
n = 1;
}
Toolkit tk = Toolkit.getDefaultToolkit();
for (int i = 0; i < n; i++) tk.beep();
}
}
}
TextFields
The java.awt.TextField class provides a widget for editing a single line of text. It's
useful for simple input and output.
There are four constructors:
public TextField() public TextField(String text) public TextField(int num_chars) public TextField(String text, int num_chars)
Because of the
way Java lays out text, you should not use the noargs constructor. Either start
off with a String or specify the number of characters this box is expected to hold.
For example,
TextField name = new TextField("Type your name here");TextField socialSecurity = new TextField(11);When the user
hits the return or enter key inside a TextField, an ActionEvent
is fired. You can trap this event with an ActionListener object,
just like you did with buttons. However, many users do not realize that
something will happen when they hit return inside a TextField.
Therefore, you should always provide an alternate method to fire the action
such as a button or a menu item. The getText() returns the
contents of the TextField. The setText(String
s) method changes it. The setEditable() method lets you determine whether or not, the user can modify the
contents of a TextField.
An example of text fields in Java
The following applet reads text
from one TextField and capitalizes it in another TextField.
import java.applet.*;
import java.awt.*;
import java.awt.event.*;
public class CapitalizeApplet extends Applet {
private TextField input;
private TextField output;
public void init () {
// Construct the TextFields
this.input = new TextField(40);
this.output = new TextField(40);
this.output.setEditable(false);
Button b = new Button("Capitalize");
// add the button to the layout
this.add(input);
this.add(b);
this.add(output);
// specify that action events sent by the
// button or the input TextField should be handled
// by the same CapitalizerAction object
CapitalizerAction ca = new CapitalizerAction(input, output);
b.addActionListener(ca);
this.input.addActionListener(ca);
// notice that ActionEvents produced by output are ignored.
}
}
class CapitalizerAction implements ActionListener {
private TextField in;
private TextField out;
public CapitalizerAction(TextField in, TextField out) {
this.in = in;
this.out = out;
}
public void actionPerformed(ActionEvent ae) {
String s = in.getText();
out.setText(s.toUpperCase());
}
}
In this program, a different
pattern is used for handling events. The constructor for the CapitalizerAction class is used to pass in references to the different components the
actionPerformed() method affects.
An example of text fields in Java
An alternate pattern uses an inner class so the private fields can be used directly.
import java.applet.*;
import java.awt.*;
import java.awt.event.*;
public class CapitalizeApplet extends Applet {
private TextField input;
private TextField output;
public void init () {
// Construct the TextFields
this.input = new TextField(40);
this.output = new TextField(40);
this.output.setEditable(false);
Button b = new Button("Capitalize");
// add the button to the layout
this.add(input);
this.add(b);
this.add(output);
// specify that action events sent by the
// button or the input TextField should be handled
// by the same CapitalizerAction object
CapitalizerAction ca = new CapitalizerAction(input, output);
b.addActionListener(ca);
this.input.addActionListener(ca);
// notice that ActionEvents produced by output are ignored.
}
class CapitalizerAction implements ActionListener {
public void actionPerformed(ActionEvent ae) {
String s = input.getText();
output.setText(s.toUpperCase());
}
}
}
An example of text fields in Java
A better pattern extra methods
in the CapitalizeApplet class and does not expose CapitalizeApplet's
private fields.
import java.applet.*;
import java.awt.*;
import java.awt.event.*;
public class CapitalizeApplet extends Applet {
private TextField input;
private TextField output;
public void init () {
// Construct the TextFields
this.input = new TextField(40);
this.output = new TextField(40);
this.output.setEditable(false);
Button b = new Button("Capitalize");
// add the button to the layout
this.add(input);
this.add(b);
this.add(output);
// specify that action events sent by the button or the input TextField
// should be handled by the same CapitalizerAction object
CapitalizerAction ca = new CapitalizerAction(input, output);
b.addActionListener(ca);
this.input.addActionListener(ca);
// notice that ActionEvents produced by output are ignored.
}
public void capitalize() {
String s = input.getText();
output.setText(s.toUpperCase());
}
}
class CapitalizerAction implements ActionListener {
private CapitalizeApplet target;
public CapitalizerAction(CapitalizeApplet target) {
this.target = target;
}
public void actionPerformed(ActionEvent ae) {
target.capitalize;
}
}
TextArea
The java.awt.TextArea class is a subclass of java.awt.TextComponent
that provides a widget for editing multiple lines of text. It's useful for
input and output.
There are five constructors:
public TextArea() public TextArea(String text) public TextArea(int rows, int columns) public TextArea(String text, int rows, int columns) public TextArea(String text, int rows, int columns, int scrollbars)Because of the way Java lays out
components, you should not use the noargs constructor. Either start off with a String or
specify the number of rows and columns this area is expected to hold. For
example,
TextArea address = new TextArea("Type your address here", 5, 80);By default, TextAreas don't have scrollbars. However you can add them by passing one of these constants to the constructor:
TextArea.SCROLLBARS_BOTH TextArea.SCROLLBARS_HORIZONTAL_ONLY TextArea.SCROLLBARS_NONE TextArea.SCROLLBARS_VERTICAL_ONLY
For example,
TextArea instructions = new TextArea("", 15, 70, TextArea.SCROLLBARS_VERTICAL_ONLY);Unlike text fields, text areas do not generate action events when the user hits return inside the area. Instead, the line is broken and the caret moves on to the next row.
However, the getText()
method does return the contents of the TextArea, and the setText()
method does change it. The setEditable() method lets you determine whether or not, the user can modify the
contents of a TextField. If these methods sound familiar it's because they're both
inherited from the common superclass of TextField and TextArea, TextComponent.
Furthermore, you can append text
to a TextArea with the append() method, insert text into the middle of a TextArea
with the insert() method, and replace a block of text with the replaceRange() method:
public synchronized void insert(String text, int position)public synchronized void append(String text) public synchronized void replaceRange(String text, int start, int end)TextComponent
Both TextArea and
TextField are subclasses of java.awt.TextComponent. This class
contains methods common to both classes including several you've already seen: getText(), setText(),
and setEditable(). The TextComponent class also defines methods for manipulating the selection and the
caret and for processing TextEvents.
The selection is used for copy
and paste and other purposes. The first character in a TextComponent is character 0; the second is character 1, and so on.
public synchronized int getSelectionStart() public synchronized void setSelectionStart(int selectionStart) public synchronized int getSelectionEnd() public synchronized void setSelectionEnd(int selectionEnd) public synchronized void select(int selectionStart, int selectionEnd) public synchronized void selectAll() public synchronized String getSelectedText()The caret is the insertion point. It's where text appears when the user types. There are two methods to adjust it:
public void setCaretPosition(int position) public int getCaretPosition()TextEvents
Both TextArea and
TextField can install a TextListener that catches TextEvents. TextComponents fire TextEvents every time the text of the component changes. This is more or less
every time the user hits a key in the component.
The java.awt.event.TextListener interface defines a single method, textValueChanged():
public abstract void textValueChanged(TextEvent te) You register a TextListener
with a TextComponent by calling the component's addTextListener()
method. For example,
TextArea password = new TextArea(24)password.addTextListener(new PasswordChecker());However, most of the time it's sufficient to just get and set the text as you need it. It's really quite rare that you need to process it character by character.
A TextListener can be
removed by calling removeTextListener().
public void removeTextListener(TextListener tl)
java.awt.Canvas
The java.awt.Canvas class is a rectangular area on which you can draw using the methods
of java.awt.Graphics discussed last week. The Canvas class has only
three methods:
public Canvas() public void addNotify() public void paint(Graphics g)You generally won't instantiate
a canvas directly. Instead you'll subclass it and override the paint()
method in your subclass to draw the picture you want.
For example the following Canvas draws a big red
oval you can add to your applet.
import java.awt.*;
public class RedOval extends Canvas {
public void paint(Graphics g) {
Dimension d = this.getSize();
g.setColor(Color.red);
g.fillOval(0, 0, d.width, d.height);
}
public Dimension getMinimumSize() {
return new Dimension(50, 100);
}
public Dimension getPreferredSize() {
return new Dimension(150, 300);
}
public Dimension getMaximumSize() {
return new Dimension(200, 400);
}
}
Any applet that uses components
should not also override paint(). Doing so will have unexpected effects because of the way Java
arranges components. Instead, create a Canvas object and do
your drawing in its paint() method.
Custom canvases are added to applets just like any other component. For example,
public void init() { this.add(new RedOval()); }Canvases themselves do not normally fire any events. Next week, we'll see how to change that in the subclasses.
An alternate approach
import java.awt.*;
public class ColoredOval extends Canvas {
public ColoredOval() {
this(Color.RED, 100, 100);
}
public ColoredOval(Color c) {
this(c, 100, 100);
}
public ColoredOval(int width, int height) {
this(Color.RED, width, height);
}
public ColoredOval(Color c, int width, int height) {
this.setColor(c);
this.setSize(width, height);
}
public void paint(Graphics g) {
Dimension d = this.getSize();
g.fillOval(0, 0, d.width, d.height);
}
}
This is almost but not quite the same effect as the previous applet. (It's a little less resizeable.)
java.awt.Choice
The java.awt.Choice class implements a popup menu with a fixed position. (The java.awt.PopupMenu class is a popup menu with no fixed position. It pops up when the
user clicks and holds the right mouse button.)
Creating a choice menu is a little more complex than creating the other user interface components you've seen. There's an extra step, adding the menu items to the menu. That is the five steps are
1.
Declare the Choice
2.
Allocate the Choice
3.
Add the menu items to the Choice
4.
Add the Choice to the layout
5.
Add an ItemListener to the Choice
For example
public void init() { Choice ch; ch = new Choice(); ch.addItem("1"); ch.addItem("2"); ch.addItem("3"); ch.addItem("4"); ch.addItem("5"); add(ch); } Methods of java.awt.Choice
The Choice class
has a number of methods to add, remove, and return different items from the
list. The list starts counting at 0.
public int getItemCount() public String getItem(int index) public synchronized void add(String item) public synchronized void addItem(String item) public synchronized void insert(String item, int position) public synchronized void remove(String item) public synchronized void remove(int position) public synchronized void removeAll()However, most of the item you'll
just build the Choice when the applet starts up, and not modify it later.
These methods get or set the current selected item in the Choice, that is the item that's shown.
public synchronized void removeAll() public synchronized String getSelectedItem() public synchronized Object[] getSelectedObjects() public int getSelectedIndex() public synchronized void select(int position) public synchronized void select(String item)ItemListeners
When the user
changes the selected item in a Choice, the Choice fires
two ItemListener events, one to indicate that the original selection has been
deselected and the other to indicate that a new selection has been made. You
can process these events by registering an ItemListener object
with your Choice.
You do not always need to do
this. It is not uncommon to only check the value of a Choice when
some other event occurs like a Button press.
For example, the following
applet builds a Choice menu with the numbers from 1 to 5. When the user makes a selection,
the applet beeps that many times.
import java.applet.*;
import java.awt.*;
import java.awt.event.*;
public class MultiBeep extends Applet {
public void init() {
Choice ch;
ch = new Choice();
ch.addItem("1");
ch.addItem("2");
ch.addItem("3");
ch.addItem("4");
ch.addItem("5");
this.add(ch);
ch.addItemListener(new BeepItem());
}
}
class BeepItem implements ItemListener {
public void itemStateChanged(ItemEvent ie) {
if (ie.getStateChange() == ItemEvent.SELECTED) {
String name = (String) ie.getItem();
Toolkit tk = Toolkit.getDefaultToolkit();
try {
int n = Integer.parseInt(name);
for (int i = 0; i < n; i++) tk.beep();
}
catch (Exception e) {
tk.beep();
}
}
}
}
The BeepItem
class implements the ItemListener interface. It filters out events caused by items being deselected
with ItemEvent.getStateChange() and only beeps if an item was selected. The available convenience
constants you can check are:
ItemEvent.DESELECTED ItemEvent.ITEM_FIRST ItemEvent.ITEM_LAST ItemEvent.ITEM_STATE_CHANGED ItemEvent.SELECTED The ItemEvent.getItem()
method is used to retrieve the actual selected item.
java.awt.Checkbox
Check boxes are
used to select a boolean value. Each Checkbox has a label that should be used to tell the user what the Checkbox
represents. For instance a Checkbox with the label "Anchovies" would be checked if the user
wants anchovies on their pizza and unchecked if they don't.
Checkboxes are often used to
select from a list of possible choices when as few selections as zero or as
many as everything on the list may be made. Adding a Checkbox to
an applet is simple. Just declare it, construct it and add it.
Checkbox c;c = new Checkbox("Pepperoni"));add(c);As usual these steps may be combined into the single line
add(new
Checkbox("Pepperoni"));
By default check boxes are
unchecked when created. If you want a Checkbox to start life
checked, use the following constructor instead:
add(new
Checkbox("Pepperoni", null, true));
The null is a
reference to a CheckboxGroup. Passing null for this argument says that this Checkbox does not
belong to a CheckboxGroup.
Every Checkbox has
a boolean value, either true or false. When the Checkbox is checked that value is true. When it is
unchecked that value is false. You access this value using the Checkbox's getState()
and setState(boolean b) methods. For example
private void handleCheckbox(Checkbox c) { if (c.getState()) price += 0.50f; else price -= 0.50f;}Checkbox Events
When the a Checkbox
changes state, normally as a result of user action, it fires an ItemEvent.
Most of the time you ignore this event. Instead you manually check the state of
a Checkbox when you need to know it. However if you want to know immediately
when a Checkbox changes state, you can register an ItemListener for the Checkbox.
An ItemEvent is
exactly the same as the item event fired by a Choice. In fact item
events are used to indicate selections or deselections in any sort of list
including checkboxes, radio buttons, choices, and lists.
For example, the following
program is an applet that asks the age-old question, "What do you want on
your pizza?" When an ingredient is checked the price of the pizza goes up
by fifty cents. When an ingredient is unchecked fifty cents is taken off. The
price is shown in a TextField.
import java.applet.*;
import java.awt.*;
import java.awt.event.*;
public class Ingredients extends Applet {
TextField t;
float price = 7.00f;
public void init() {
Checkbox c;
this.add(new Label("What do you want on your pizza?", Label.CENTER));
this.t = new TextField(String.valueOf(price));
// so people can't change the price of the pizza
t.setEditable(false);
Pricer p = new Pricer(price, t);
c = new Checkbox("Pepperoni");
this.add(c);
c.addItemListener(p);
c = new Checkbox("Olives");
c.addItemListener(p);
this.add(c);
c = new Checkbox("Onions");
c.addItemListener(p);
this.add(c);
c = new Checkbox("Sausage");
c.addItemListener(p);
this.add(c);
c = new Checkbox("Peppers");
c.addItemListener(p);
this.add(c);
c = new Checkbox("Extra Cheese");
c.addItemListener(p);
this.add(c);
c = new Checkbox("Ham");
c.addItemListener(p);
this.add(c);
c = new Checkbox("Pineapple");
c.addItemListener(p);
this.add(c);
c = new Checkbox("Anchovies");
c.addItemListener(p);
this.add(c);
this.add(t);
}
}
class Pricer implements ItemListener {
TextField out;
double price;
public Pricer(double baseprice, TextField out) {
this.price = baseprice;
this.out = out;
}
public void itemStateChanged(ItemEvent ie) {
if (ie.getStateChange() == ItemEvent.SELECTED) this.price += 0.50f;
else this.price -= 0.50f;
// Change the price
this.out.setText(String.valueOf(price));
}
}
java.awt.CheckboxGroup
Checkbox groups are collections
of checkboxes with the special property that no more than one checkbox in the
same group can be selected at a time. The checkboxes in a CheckboxGroup are often called radio buttons. Checkboxes that are members of the
same CheckboxGroup cannot be checked simultaneously. When the user checks one, all
others are unchecked automatically.
The constructor for a CheckboxGroup is trivial. No arguments are needed. You do not even need to add
the CheckboxGroup to the applet since checkbox groups are themselves not
user-interface widgets, just ways of arranging checkboxes.
CheckboxGroup cbg = new CheckboxGroup();
To make check boxes act like
radio buttons, use this constructor for each Checkbox in the group.
public Checkbox(String label, CheckboxGroup cbg,
boolean checked)
The label is the label for this Checkbox.
The CheckboxGroup is the group you want this Checkbox to belong to
and must already exist.
At any time, you can get or set
the selected Checkbox with these two methods:
public Checkbox getSelectedCheckbox()public synchronized void setSelectedCheckbox(Checkbox box)java.awt.CheckboxGroup example
The following program asks the customer how they're going to pay for their pizza, Visa, Mastercard, American Express, Discover, cash or check. Someone may want both anchovies and pineapple on their pizza, but they're unlikely to pay with both Visa and American Express.
import java.applet.*;
import java.awt.*;
public class PaymentMethod extends Applet {
public void init() {
this.add(new Label("How will you pay for your pizza?"));
CheckboxGroup cbg = new CheckboxGroup();
this.add(new Checkbox("Visa", cbg, false));
this.add(new Checkbox("Mastercard", cbg, false));
this.add(new Checkbox("American Express", cbg, false));
this.add(new Checkbox("Discover", cbg, false));
this.add(new Checkbox("Cash", cbg, true)); // the default
}
}
There isn't any
action in this simple example applet. If you need to add action as radio
buttons are checked and unchecked, you do it just the same as for any other Checkbox.
java.awr.List
Scrolling lists are useful for storing long lists of things one to a line. The things in the list are called items, but each one is just a String. For example,
LIST Methods
You create a new List with one of these
three constructors:
public List() public List(int numLines) public List(int numLines, boolean allowMultipleSelections) For example,
  List l = new List(8,
true);
numLines is the number of items you want to be visible in the scrolling
list. It is not necessarily the same as the number of items in the list which
is limited only by available memory. allowMultipleSelections
says whether the user is allowed to select more than one item at once
(typically by Shift-clicking).
The following methods add items at the end of the list:
public void add(String item) public void addItem(String item)These two methods add items at the specified position in the list.
public synchronized void add(String item, int index) public synchronized void addItem(String item, int index)The following methods remove items from the List:
public synchronized void removeAll() public synchronized void remove(String item) public synchronized void remove(int position) public synchronized void delItem(int position)
These methods allow you to retrive
particular items from the List:
public int getItemCount() public String getItem(int index) public synchronized String[] getItems()
You ran also replace a particular item:
public synchronized void replaceItem(String newValue, int index)These methods allow you to determine which item the user has selected:
public synchronized int getSelectedIndex() public synchronized int[] getSelectedIndexes() public synchronized String getSelectedItem() public synchronized String[] getSelectedItems() public Object[] getSelectedObjects()If a list allows multiple
selections, you should use the plural forms of the above methods. You can
determine whether multiple selections are allowed with isMultipleMode() and change it with setMultipleMode().
public boolean isMultipleMode() public synchronized void setMultipleMode(boolean b)These methods allow you to manipulate the selection:
public synchronized void select(int index) public synchronized void deselect(int index) public boolean isIndexSelected(int index)These two methods determine whether an item at a particular index is currently visible in the List box:
public int getVisibleIndex() public synchronized void makeVisible(int index)List Events
Lists can fire
two separate types of events. When a list item is selected or deselected, the List fires
an ItemEvent. However, when the user double clicks on a list item, the List fires
an ActionEvent. Therefore, you can register both an ItemListener to process
selections and/or an ActionListener to process double clicks.
public void addItemListener(ItemListener l)public void removeItemListener(ItemListener l)public void addActionListener(ActionListener l)public void removeActionListener(ActionListener l)The action command in the ActionEvent is the list
item which was double clicked.
java.awt.Scrollbar
Lists, TextAreas,
and ScrollPanes come with ready made scrollbars. However if you want to scroll any
other object you'll have to use a java.awt.Scrollbar.
Scrollbars have many uses. At their most basic they're used for moving the
visible area. They can also be used to set a value between two numbers. Or they
can be used to flip through a number of screens as in a database operation that
looks at successive records.
There are three constructors:
public Scrollbar()public Scrollbar(int orientation)public Scrollbar(int orientation, int value, int visible, int min, int max) The orientation
argument is one of the mnemonic constants, Scrollbar.HORIZONTAL or
Scrollbar.VERTICAL. As you expect this determines whether the Scrollbar is
laid out from left to right or top to bottom.
A Scrollbar has an int value at
all times. This value will be between the minimum and the maximum
value set by the last two arguments to the constructor. When a Scrollbar is
created, its value is given by the value argument. The
default is 0.
Finally visible
represents the size of the visible portion of the scrollable area in pixels.
The Scrollbar uses this when moving up or down a page.
A Scrollbar fires an
adjustment event when its value changes. You register an adjustment listener to
catch this event. This class needs an adjustmentValueChanged() method with this signature:
public void adjustmentValueChanged(AdjustmentEvent e)
The following program is an
applet that changes the number in a TextField between 1 and
100 based on the position of the thumb (the movable part of the Scrollbar).
In a practical application the number would of course mean something.

import java.applet.*;
import java.awt.*;
import java.awt.event.*;
public class Scrollie extends Applet implements AdjustmentListener {
TextField t;
Scrollbar sb;
public void init() {
int initialValue = 1;
sb = new Scrollbar(Scrollbar.HORIZONTAL, initialValue, 100, 1, 100);
sb.addAdjustmentListener(this);
this.add(sb);
this.t = new TextField(4);
this.t.setText(String.valueOf(initialValue));
this.add(t);
}
public void adjustmentValueChanged(AdjustmentEvent e)
int val = sb.getValue();
this.t.setText(String.valueOf(val));
}
}
Procedural Programs
Traditional, procedural programs have a single order of execution. Control moves in a linear fashion from the first statement to the second statement to the third statement and so forth with occasional loops and branches. User input occurs at precisely defined points in the program. A user cannot input data excet when the computer is ready to receive it.
This doesn't work well with GUI programs. Users can often select menu items, type text, click the mouse, or otherwise provide input at almost any time. They have many, many choices at any one point about what to do.
The Event Queue
Instead GUI
models require an event approach. Each user action, be it a mouse click, a key
press, or something else is placed in an event queue as it occurs.
Normally this takes place at the operating system level. The program removes
events from the queue and processes them, one at a time. Generally an infinite while loop
reads from the queue, and a big switch statement dispatches each
different event to the appropriate code to handle it.
Depending on the architecture of the system, there may be only one system event queue or each application may have its own event queue. The operating system is responsible for making sure the right events get to the right programs.
In the applications we're concerned with, that is Java programs, each virtual machine has one main AWT event queue. There's almost certainly a native, event queue as well, but from here on out I'll only talk about the Java event queue. Your Java program will only see events that are sent to it by the native user interface.
Low Level Events
Low level events represent direct communication from the user. A Low level event is a key press or a key release, a mouse click, drag, move, or release, and so on.
These include:
java.awt.event.ComponentEvent
component resized, moved, etc.
java.awt.event.FocusEvent
component got focus, lost focus
java.awt.event.KeyEvent
key press, key release, etc.
java.awt.event.MouseEvent
mouse down, mouse move, mouse drag, mouse up
java.awt.event.ContainerEvent
a component was added to or removed from the container
java.awt.event.WindowEvent
the window was activated, deactivated, opened, closed,
inconified, or deiconified
java.lang.Object | +---java.util.EventObject | +---java.awt.AWTEvent | +---java.awt.event.ComponentEvent | +---java.awt.event.InputEvent | | | +---java.awt.event.KeyEvent | | | +---java.awt.event.MouseEvent | +---java.awt.event.FocusEvent | +---java.awt.event.ContainerEvent | +---java.awt.event.WindowEventHigh Level Events
High level or semantic events encapsulate the meaning of a user interface component. These include:
java.awt.event.ActionEvent
do a command
java.awt.event.AdjustmentEvent
value was adjusted
java.awt.event.ItemEvent
item state has changed
java.awt.event.TextEvent
the value of the text object changed
For example,
when the user clicks the mouse on a button, then releases it, the button gets
two or three separate, low-level, mouse events. (One for mouse down, one for
mouse up, and possibly one for mouse drag if the user moves the mouse while the
button is pressed.) However, the button then fires one high level ActionEvent.
If the user clicks the mouse on a button, moves the mouse off the button, then releases it, the Button gets two separate, low-level, mouse events. (One for mouse down, one for for mouse drag.) However, the button eats these events and does nothing.
The Event Class Hierarchy in Java
Each high level
event class extends java.awt.AWTEvent.
java.lang.Object | +---java.util.EventObject | +---java.awt.AWTEvent | +---java.awt.event.ActionEvent | +---java.awt.event.ItemEvent | +---java.awt.event.AdjustmentEvent | +---java.awt.event.TextEvent | +----java.awt.event.ComponentEvent | +---java.awt.event.InputEvent | | | +---java.awt.event.KeyEvent | | | +---java.awt.event.MouseEvent | +---java.awt.event.FocusEvent | +---java.awt.event.ContainerEvent | +---java.awt.event.WindowEventProcessing Events
The Java runtime
is responsible for handling the event queue. In particular it makes sure that
each low-level event is directed to the proper component. You do not
need to worry about deciding which component the event is meant for. The
runtime handles this for you. In particular the runtime passes the event to the
component's processEvent() method:
protected
void processEvent(AWTEvent e)
The processEvent() method determines the type of the event and passes it on to one of
five other methods in the java.awt.Component class:
protected void processComponentEvent(ComponentEvent e)protected void processFocusEvent(FocusEvent e)protected void processKeyEvent(KeyEvent e)protected void processMouseEvent(MouseEvent e)protected void processMouseMotionEvent(MouseEvent e)
Each of these methods looks to see if any listener objects of the right type are registered for this component. If so, the event is passed to each of those listener objects in an unpredictable order.
Internally, these methods use a java.awt.AWTEventMulticaster object to track the registration of listeners with a component.
EventListeners
To respond to an
event a component receives you register an event listener for the event type
with the component. Event listeners are objects which implement a java.util.EventListener interface. The AWT defines eleven sub-interfaces of java.util.EventListener, one for each type of event:
·
java.awt.event.ComponentListener
·
java.awt.event.ContainerListener
·
java.awt.event.FocusListener
·
java.awt.event.KeyListener
·
java.awt.event.MouseListener
·
java.awt.event.MouseMotionListener
·
java.awt.event.WindowListener
·
java.awt.event.ActionListener
·
java.awt.event.AdjustmentListener
·
java.awt.event.ItemListener
·
java.awt.event.TextListener
E ach of these
interfaces defines the events an event listener of that type must be prepared
to respond to. For example, MouseListener declares these methods,
public abstract void mouseClicked(MouseEvent e)public abstract void mousePressed(MouseEvent e)public abstract void mouseReleased(MouseEvent e)public abstract void mouseEntered(MouseEvent e)public abstract void mouseExited(MouseEvent e)When a component receives a
mouse event, its processMouseEvent() method checks the ID of the mouse event to determine whether this
is a mouse pressed, mouse released, mouse entered, or mouse exited event. Then
it calls the corresponding method in each registered MouseListener object.
Mouse Events
A java.awt.event.MouseEvent is sent to a component when the mouse state changes over the
component. There are seven types of mouse events, each represented by an
integer constant:
|
|
A mouse button was pressed, then released |
|
|
The mouse was moved over the component while a mouse button was held down |
|
|
The cursor entered the component's space |
|
|
The cursor left the component's space |
|
|
The mouse moved in the component's space |
|
|
The mouse button was pressed (but not released) over the component |
|
|
The mouse button was released ever the component. |
Besides its type, the main thing
you want to know about a MouseEvent is the location; that is, where the mouse was clicked. You can either
request the x and y locations separately, or together as a java.awt.Point object.
public int getX()public int getY()public Point getPoint()Mouse Listeners and and Mouse Motion Listeners
Generally you
respond to mouse events directed at your component, by registering a MouseListener object with the component.
public
interface MouseListener extends EventListener
For reasons of efficiency, the MouseListener interface only declares five methods:
public abstract void mouseClicked(MouseEvent e)public abstract void mousePressed(MouseEvent e)public abstract void mouseReleased(MouseEvent e)public abstract void mouseEntered(MouseEvent e)public abstract void mouseExited(MouseEvent e)
A mouse listener
does not respond to mouse dragged or mouse moved events because these are too
common. Responding to each of them, even with a noop method, would result in
many unnecessary method calls. Instead, mouse moved and mouse dragged events
are responded to by the MouseMotionListener interface.
public
interface MouseMotionListener extends EventListener
The MouseMotionListener interface declares these two methods that are missing from MouseListener:
public abstract void mouseDragged(MouseEvent e)public abstract void mouseMoved(MouseEvent e)If you don't care about mouse dragged and mouse moved events, then you simply don't register a MouseMotionListener on the component and the component won't bother to report such events.
Dots
For example,
let's suppose you want an applet that draws a red circle wherever the user clicks
the mouse. Recall that applet's are subclasses of java.awt.Component. Therefore you need to install a MouseListener on your
applet that responds to mouse clicked events. In an applets of this nature it's
simplest just to make the applet itself the MouseListener.
In this case, since you need to
store the points clicked in a Vector, it's most convenient to use getPoint().
The coordinates are relative to the component to which this event is directed,
not necessarily the global coordinate system of the applet (though in this case
they're the same thing).
import java.applet.*;
import java.awt.*;
import java.awt.event.*;
import java.util.*;
public class Dots extends Applet implements MouseListener {
Vector theDots = new Vector();
public void init() {
this.addMouseListener(this);
}
public void mouseClicked(MouseEvent e) {
theDots.addElement(e.getPoint());
this.repaint();
}
// You have to implement these methods, but they don't need
// to do anything.
public void mousePressed(MouseEvent e) {}
public void mouseReleased(MouseEvent e) {}
public void mouseEntered(MouseEvent e) {}
public void mouseExited(MouseEvent e) {}
// paint the dots
public void paint(Graphics g) {
g.setColor(Color.red);
Enumeration e = theDots.elements();
while (e.hasMoreElements()) {
Point p = (Point) e.nextElement();
g.drawOval(p.x, p.y, 5, 5);
}
}
}
KeyEvents
A java.awt.event.KeyEvent is sent to a component when a key is pressed while the component
has the focus. There are three types of key events, each represented by an
integer constant:
|
|
A key was pressed |
|
|
A key was released |
|
|
A key press followed by a key release. |
Most of the time you'll only respond to the last event, KeyEvent.KEY_TYPED.
The main thing you want to know
about a KeyEvent is what key was pressed. You get this with the getKeyChar()
method.
public
char getKeyChar()
This returns the Unicode character corresponding to the pressed key.
A KEY_PRESSED or KEY_RELEASED
event doesn't just have a character. It also has a key code. (KEY_TYPED events
do not have key codes. More precisely the key code is undefined.) If you're
concerned about the key that was pressed, rather than the character that was
typed, you'll ask the key event for its key code rather than its key char. You
get the code for a KeyEvent by calling getKeyCode():
public
int getKeyCode()
You can convert this into a
localized string such as "END", "F4" or "Q" by
passing it to the static method, KeyEvent.getKeyText():
public
static String getKeyText(int keyCode)
Generally you respond to key
events directed at your component, by registering a KeyListener
object with the component. The KeyListener interface defines the
following methods, one for each type of KeyEvent.
public abstract void keyTyped(KeyEvent e)public abstract void keyPressed(KeyEvent e)public abstract void keyReleased(KeyEvent e)Key Codes
Not all keyboards are created alike. Macs have Command and option keys. PCs have Alt keys. Some PCs have a Windows 95 key. Some don't. Some keyboards have numeric keypads, but many don't. Emacs expects there to be a Meta key which I for one have never actually seen on any keyboard in existence, but which is often mapped to the Escape key (which is again a key some keyboards don't have). Keyboard inconsistency is one of the problems a truly cross-platform environment has to deal with.
The KeyEvent
class defines a little more than one hundred virtual key codes that map to
different, common, keyboard keys. KeyEvent.VK_0 thru KeyEvent.VK_9 are the same as ASCII '0' thru '9' (0x30 - 0x39)
·
KeyEvent.VK_0
·
KeyEvent.VK_1
·
KeyEvent.VK_2
·
KeyEvent.VK_3
·
KeyEvent.VK_4
·
KeyEvent.VK_5
·
KeyEvent.VK_6
·
KeyEvent.VK_7
·
KeyEvent.VK_8
·
KeyEvent.VK_9
KeyEvent.VK_A thru KeyEvent.VK_Z are the same as ASCII 'A' thru 'Z'; that is, KeyEvent.VK_A, KeyEvent.VK_B, KeyEvent.VK_C, KeyEvent.VK_D, KeyEvent.VK_E, KeyEvent.VK_F, and so on.
Funky Key Codes
The remaining keys are the interesting ones:
|
|
|
|
Modifier Keys
Both KeyEvent and
MouseEvent are subclasses of java.awt.event.InputEvent. The primary
feature InputEvent adds is the ability to test for additional conditions on the event
such as whether the ALT key was pressed at the same time as another key, or
whether the option key was held while the mouse was dragged. For example, when
the shift key is held down, many drawing programs constrain lines to be
vertical or horizontal, rectangles to be squares, ovals to be circles, and so
on.
The following four methods tell you whether or not the specified key was pressed when this event was sent.
public boolean isShiftDown()public boolean isControlDown()public boolean isMetaDown()public boolean isAltDown()
All may be
invoked on either MouseEvent objects or KeyEvent objects.
There is also a getWhen()
method which returns the time the event occurred. This is given as the number
of milliseconds since midnight, January 1, 1970, Greenwich Mean Time.
public
long getWhen()
The java.util.Date and java.util.Calendar classes have methods you can use to convert this to a date and
time. However, most of the time you'll only be concerned with differences in
the time between one event and another.
Mouse Button Modifiers
An InputEvent's
modifiers are stored as an int value. Each bit in the int is a flag
corresponding to a particular modifier. The corresponding values for these
flags are given as public
final static ints in the InputEvent
class:
·
InputEvent.SHIFT_MASK
·
InputEvent.CTRL_MASK
·
InputEvent.META_MASK
·
InputEvent.ALT_MASK
·
InputEvent.BUTTON1_MASK
·
InputEvent.BUTTON2_MASK
·
InputEvent.BUTTON3_MASK
Y ou can retrieve the modifiers for an
event with the getModifiers() method:
public
int getModifiers()
Use the bitwise & operator to test
whether a particular flag is set. For example,
if (e.getModifiers() & InputEvent.BUTTON2_MASK != 0) { System.out.println("Button 2 was pressed");}Focus Events
At any given time exactly one component in an applet should have the focus. The component that possesses the focus receives user input from the keyboard and the mouse. In other words it is the component to which low-level events are directed.
The focus can be adjusted in a number of ways. For example, if the user hits the tab key, the focus will generally shift from one component to the next. If the user hits Shift-Tab, the focus will move back one component. When the user selects a component with the mouse, that component gets the focus.
Through whatever means it gets
it, when a component gains or loses the focus, it gets a FocusEvent.
A change in the focus can be permanent or temporary. Permanent focus change
occurs when the focus is directly moved from one component to another, either
by calling requestFocus() or by direct user action such as the Tab key. Temporary focus
change occurs when a component gains or loses focus focus as an indirect result
of another operation, such as a window deactivation. In this case, the original
focus state is automatically restored once the operation is finished, or the
window is reactivated.
This is a bad choice of terms. Even a component that has the focus permanently can lose it.
The isTemporary() method returns true if the focus change is temporary, false if it's permanent.
public
boolean isTemporary()
You respond to changes in focus
by installing a FocusListener in the component. This interface declares two methods:
public abstract void focusGained(FocusEvent e)public abstract void focusLost(FocusEvent e)Component Events
java.awt.event.ComponentEvent is the superclass of all the events we've discussed so far. It also
has a few events of its own that allow you to react when a component is shown,
hidden, moved, or resized. These are
ComponentEvent.COMPONENT_MOVEDComponentEvent.COMPONENT_RESIZEDComponentEvent.COMPONENT_SHOWNComponentEvent.COMPONENT_HIDDEN
As you might
guess, you respond to these events by registering a java.awt.event.ComponentListener with your component. This interface declares four methods:
public abstract void componentResized(ComponentEvent e)public abstract void componentMoved(ComponentEvent e)public abstract void componentShown(ComponentEvent e)public abstract void componentHidden(ComponentEvent e)The ComponentEvent class doesn't have any particularly useful methods of its own, but
you can use the various methods of the java.awt.Component
class to determine where a component was moved or to what size it was resized.
Converting low-level events to high level events
The native operating system and user interface only send low-level events. They do not send ActionEvents, TextEvents, ItemEvents, or AdjustmentEvents. Instead each component which fires these events first listens for low-level events like key presses. (Actually, the component's peer does this.) When it sees the right low-level event or combination of low level events, it eats those events and fires a new high level event.
Adapter Classes
The AWT provides
a number of adapter classes for the different EventListener interfaces. These are:
·
ComponentAdapter
·
ContainerAdapter
·
FocusAdapter
·
KeyAdapter
·
MouseAdapter
·
MouseMotionAdapter
·
WindowAdapter
E ach adapter class implements the corresponding interface with a series of do-nothing methods. For example, MouseListener declares these five methods:
public abstract void mouseClicked(MouseEvent e)public abstract void mousePressed(MouseEvent e)public abstract void mouseReleased(MouseEvent e)public abstract void mouseEntered(MouseEvent e)public abstract void mouseExited(MouseEvent e)
Therefore, MouseAdapter
looks like this:
package java.awt.event;
import java.awt.*;
import java.awt.event.*;
public class MouseAdapter implements MouseListener {
public void mouseClicked(MouseEvent e) {}
public void mousePressed(MouseEvent e) {}
public void mouseReleased(MouseEvent e) {}
public void mouseEntered(MouseEvent e) {}
public void mouseExited(MouseEvent e) {}
}
By subclassing MouseAdapter
rather than implementing MouseListener directly, you can avoid having to write the methods you don't
actually need. You only override those that you plan to actually implement.
An example of Adapter Classes
Here's a mouse adapter that beeps when the mouse is clicked
import java.awt.*;
import java.awt.event.*;
public class MouseBeeper extends MouseAdapter {
public void mouseClicked(MouseEvent e) {
Toolkit.getDefaultToolkit().beep();
}
}
Without
extending the MouseAdapter class, I would have had to write the same class like
this
import java.awt.*;
import java.awt.event.*;
public class MouseBeeper implements MouseListener {
public void mouseClicked(MouseEvent e) {
Toolkit.getDefaultToolkit().beep();
}
public void mousePressed(MouseEvent e) {}
public void mouseReleased(MouseEvent e) {}
public void mouseEntered(MouseEvent e) {}
public void mouseExited(MouseEvent e) {}
}
Adapter classes are a minor convenience. You do not need to use the adapter classes if you don't want to.
Consuming Events
Sometimes an application needs to keep some events from being processed normally by a component. For example, a visual interface builder might need to allow a user to drag a button around the screen. In this case, you wouldn't want the mouse press to activate the button.
You can consume an InputEvent,
that is a MouseEvent or a KeyEvent, by calling its consume() method:
public
void consume()
Once an InputEvent
is consumed, the source component will not process the event itself. However,
the event will still be dispatched to all registered listeners.
Working with the event queue
The java.awt.EventQueue class represents a queue of events waiting to be processed. You can
create your own instances of this class using the norags constructor:
public
EventQueue()
For example,
EventQueue
MyQueue = new EventQueue();
However, most of the time you'll
be more interested in the system event queue. This is created for you
automatically. You can get a reference to it with the getSystemEventQueue() method in the java.awt.Toolkit class like this:
EventQueue
systemQueue = Toolkit.getDefaultToolkit().getSystemEventQueue();
An applet cannot call this method without generating a security exception.
Oncee you have a reference to the system event queue, you can manipulate it with the following methods:
public synchronized void postEvent(AWTEvent e)public synchronized AWTEvent getNextEvent()public synchronized AWTEvent peekEvent()public synchronized AWTEvent peekEvent(int n)
postEvent() lets you
put an event in the queue. getNextEvent() removes and returns the top event in the queue. peekEvent()
returns the top event in the queue but does not remove it from the queue. peekEvent(int n) returns the nth event in the queue.
What is a LayoutManager?
When you add a
component to an applet or a container, the container uses its layout
manager to decide where to put the component. Different LayoutManager classes use different rules to place components.
java.awt.LayoutManager is an interface. Five classes in the java packages implement
it:
·
FlowLayout
·
BorderLayout
·
CardLayout
·
GridLayout
·
GridBagLayout
A FlowLayout
arranges widgets from left to right until there's no more space left. Then it
begins a row lower and moves from left to right again. Each component in a FlowLayout
gets as much space as it needs and no more. A FlowLayout is useful
for laying out buttons but not for much else. This is the default LayoutManager for applets and panels (special containers to aid with layouts
about which you'll learn more very shortly).
A BorderLayout organizes
an applet into North, South, East, West and Center sections. North, South, East
and West are the rectangular edges of the applet. They're continually resized
to fit the sizes of the widgets included in them. Center is whatever's left
over in the middle.
A CardLayout breaks the
applet into a deck of cards, each of which has its own LayoutManager. Only one card appears on the screen at a time. The user flips
between cards, each of which shows a different set of components. The common
analogy is with HyperCard on the Mac and Toolbook on Windows. In Java this
might be used for a series of data input screens, where more input is needed
than can comfortably be fit on one screen.
A GridLayout divides an
applet into a specified number of rows and columns which form a grid of cells,
each equally sized and spaced. As Components are added to the layout they are
placed in the cells, starting at the upper left hand corner and moving to the
right and down the page. Each component is sized to fit into its cell. This
tends to squeeze and stretch components unnecessarily. However the GridLayout
is great for arranging Panels.
GridBagLayout is the most precise of the five AWT LayoutManagers. It's similar to
the GridLayout, but components do not need to be the same size. Each component can
occupy one or more cells of the layout. Furthermore components are not
necessarily placed in the cells beginning at the upper left-hand corner and
moving to the right and down.
In simple applets with just a few components you often need only one layout manager. In more complicated applets, however, you'll often split your applet into panels, lay out the panels according to a layout manager, and give each panel its own layout manager that arranges the components inside it.
FlowLayout
A FlowLayout
arranges widgets from left to right until there's no more space left. Then it
begins a row lower and moves from left to right again. Each component in a FlowLayout
gets as much space as it needs and no more. A FlowLayout is useful
for laying out buttons but not for much else.
FlowLayout is the default layout for java.awt.Panel which java.applet.Applet subclasses. Therefore you don't need to do anything special to
create a FlowLayout in an applet. However you do need to use the following constructors
if you want to use a FlowLayout in a Window.
LayoutManagers have constructors like any other class. The constructor for a FlowLayout is
public
FlowLayout()
Thus to create a new FlowLayout object you
write
FlowLayout fl;fl = new FlowLayout();
As usual this can be shortened to
FlowLayout
fl = new FlowLayout();
You tell an applet to use a
particular LayoutManager instance by passing the object to the applet's setLayout()
method like this:
this.setLayout(fl);
Most of the time setLayout()
is called in the init() method. You normally just create the LayoutManager right
inside the call to setLayout() like this
this.setLayout(new
FlowLayout());
FlowLayout
The following applet uses a FlowLayout
to position a series of buttons that mimic the buttons on a tape deck.
import java.applet.*; import java.awt.*; public class TapeDeck extends Applet { public void init() { this.setLayout(new FlowLayout()); this.add( new Button("Play")); this.add( new Button("Rewind")); this.add( new Button("Fast Forward")); this.add( new Button("Pause")); this.add( new Button("Stop")); } }FlowLayout
A LayoutManager rearranges the components in the container based on their size
relative to the size of the container.
Consider the window that just popped up. It's got five buttons of varying sizes. Resize the window and watch how the buttons move. In particular try making it just wide enough so that all the buttons fit on one line. Then try making it narrow and tall so that there's only one button on line. See if you can manage to cover up some of the buttons. Then uncover them. Note that whatever you try to do, the order of the buttons is maintained in a logical way. Button 1 is always before button 2 which is always before button 3 and so on.
It's harder to show, but imagine if the components changed sizes, as they might if you viewed this page in different browsers or on different platforms with different fonts. The layout manager handles all these different cases for you to the greatest extent possible. If you'd used absolute positioning and the window were smaller than expected or the components larger than you expected, some components would likely be truncated or completely hidden. In essence a layout manager defers decisions about positioning until runtime.
Setting FlowLayout Alignment
You can change
the alignment of a FlowLayout in the constructor. Components are normally centered in an applet.
You can make them left or right justified instead. To do this just pass one of
the defined constants FlowLayout.LEFT, FlowLayout.RIGHT or FlowLayout.CENTER to the constructor, e.g.
this.setLayout(new FlowLayout(FlowLayout.LEFT));this.setLayout(new FlowLayout(FlowLayout.RIGHT));this.setLayout(new FlowLayout(FlowLayout.CENTER));Below you see all three variants:
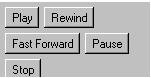
Left Alignment
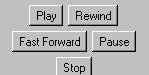
Center Alignment

Right Alignment
Separating Components with Space in a FlowLayout
Most LayoutManagers allow you to control the minimum amount of vertical and horizontal
space between different components. To do this in a FlowLayout,
you pass the horizontal and vertical space you want, in pixels, to the
constructor immediately after the alignment argument.
public
FlowLayout(int alignment, int hspace, int vspace);
For instance to set up a FlowLayout
with a ten pixel horizontal gap and a twenty pixel vertical gap, aligned with
the left edge of the panel, you would use the constructor
FlowLayout fl = new FlowLayout(FlowLayout.LEFT, 20, 10);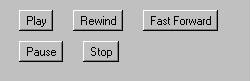
Buttons arranged according to a center-aligned FlowLayout with a 20
pixel horizontal spacing and a 10 pixel vertical spacing
import java.applet.*;
import java.awt.*;
public class SpaceTapeDeck extends Applet {
public void init() {
this.setLayout( new FlowLayout(FlowLayout.LEFT, 20, 10));
this.add( new Button("Play"));
this.add( new Button("Rewind"));
this.add( new Button("Fast Forward"));
this.add( new Button("Pause"));
this.add( new Button("Stop"));
}
}
BorderLayout
A BorderLayout
places objects in the North, South, East, West and center of an applet. You
create a new BorderLayout object much like a FlowLayout object, in the init()
method inside a call to setLayout like this:
this.setLayout(new BorderLayout());There's no
centering, left alignment, or right alignment in a BorderLayout.
However, you can add horizontal and vertical gaps between the areas. Here's how
you'd add a five pixel horizontal gap and a ten pixel vertical gap to a BorderLayout:
this.setLayout(new BorderLayout(5, 10));To add
components to a BorderLayout include the name of the section you wish to add them to like this
this.add("South", new Button("Start"));
A BorderLayout.
The rectangles were drawn
deliberately so you could see the boundaries between sections and are not a
feature of a generic BorderLayout.
As you can see from the above picture, the North and South sections extend across the applet from left to right. The East and West sections do not extend from the top of the applet to the bottom, but only from the bottom of the North section to the top of South section. The North, South, East and West sections will be made large enough for whatever components they hold. The center gets whatever is left over. The exact size is unpredictable. Similarly the exact packing of components inside a section is unpredictable as well.
Example of BorderLayout
import java.applet.*;
import java.awt.*;
public class BorderButtons extends Applet {
public void init() {
this.setLayout(new BorderLayout(20, 10));
this.add("North", new Button("North"));
this.add("South", new Button("South"));
this.add("Center", new Button("Center"));
this.add("East", new Button("East"));
this.add("West", new Button("West"));
}
}
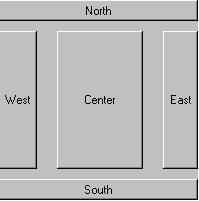
CardLayout
The CardLayout
is unusual. It breaks the applet into a deck of cards, each of which will
normally have a panel with its own LayoutManager. Only one card appears on the
screen at a time. You then flip between cards, each of which shows a different
set of components. The common analogy is with HyperCard on the Mac and Toolbook
on Windows. In Java this might be used for a series of data input screens,
where more input is needed than can comfortably be fit on one screen.
Conversely, you can use a CardLayout for a slide show, where there's more data to be presented than will
fit on one screen.
For example, this CardTest
applet, one of Sun's standard demo applets, uses a CardLayout
to flip between different layouts for the same five buttons:
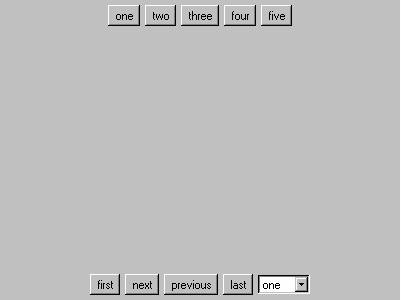
Using CardLayouts
You create a CardLayout with the CardLayout()
constructor.
this.setLayout(new CardLayout());As usual you can create a CardLayout with a specified gap between components like this.
this.setLayout(new CardLayout(3, 4));In this example there will be a three pixel horizontal gap and a four pixel vertical gap between components.
Each card has a name. A new card
is created when you add a component to the card. Add components to cards by
passing the name of the card and the component to add to the add() method
like this
this.setLayout(new CardLayout());this.add("Pizza", new Label("How do you like your pizza?"));this.add("Pizza", new Button("OK"));this.add("Payment", new Label("How would you like to pay?"));this.add("Payment", new Button("OK"));this.add("Address", new Label("Delivery Instructions"));this.add("Address", new Button("Order"));
One common technique is to name each card after a number.
this.setLayout(new CardLayout());this.add("1", new Label("First Card"));this.add("2", new Label("Second Card"));this.add("3", new Label("Third Card"));this.add("4", new Label("Fourth Card"));this.add("5", new Label("Fifth Card"));this.add("6", new Label("Sixth Card")); Internally the
list of cards and their names is stored in a java.util.Hashtable.
This means that there's no guaranteed or built-in order to the cards. You need
to keep track of this yourself.
Flipping Cards
Normally you add
a panel with its own layout manager to each card. Each card should have some
means for navigating between cards. The AWT does not provide one. Finally note
that you can add the same component to more than one card. This is useful, for
example, for creating a Choice menu with the names of all the cards as a navigation aid.
The following five CardLayout
methods allow you to switch cards. In all cases you must specify the container
inside of which you're flipping. This can be the applet, the window, or the
panel that's arranged with this card layout.
public void first(Container parent)public void next(Container parent)public void previous(Container parent)public void last(Container parent)public void show(Container parent, String name)GridLayout
A GridLayout
specifies the number of rows and columns into which components will be placed.
The applet is broken up into a table of equal sized cells.
GridLayout is useful when you want to place a number of similarly sized
objects. It's great for putting together lists of checkboxes and radio buttons
as you did in the Ingredients applet. Below is a modified version that sets aside eight rows and
one column. This gives one row for each Checkbox.
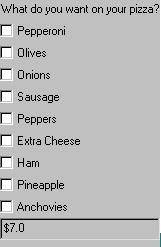
GridLayout
Here's the source code:
import java.applet.*;
import java.awt.*;
public class Ingredients2 extends Applet {
TextField t;
double price = 7.00;
public void init() {
this.setLayout(new GridLayout(11,1));
this.add(new Label("What do you want on your pizza?", Label.CENTER));
this.add(new Checkbox("Pepperoni"));
this.add(new Checkbox("Olives"));
this.add(new Checkbox("Onions"));
this.add(new Checkbox("Sausage"));
this.add(new Checkbox("Peppers"));
this.add(new Checkbox("Extra Cheese"));
this.add(new Checkbox("Ham"));
this.add(new Checkbox("Pineapple"));
this.add(new Checkbox("Anchovies"));
this.t = new TextField("$" + String.valueOf(price));
// so people can't change the price of the pizza
this.t.setEditable(false);
this.add(this.t);
}
/* I've removed the code to handle events
since it isn't relevant to this example, and since I haven't
had time to port it to 1.1 */
}
Grid layouts are very easy to use. This applet is just three lines different from the previous version and one of those is a change in the name of the class that wasn't really necessary.
GridBagLayout
The GridBagLayout provides a grid for components like GridLayout, but allows
a single component element to occupy multiple cells of the grid. Each GridBagLayout uses a rectangular grid of cells, just like a GridLayout.
However the cells are determined and shaped by the components placed in them
rather than the components being shaped to fit the cells.
According to Peter van der Linden:
GridBagLayout was contributed to Javasoft by a programmer who wanted to support the Java effort. It was intended as a proof that the AWT offered enough features for programmers to write their own layout managers. It wasn't designed with human factors and ease of use in mind. If it bothers you (it bothers me) then just don't use it. Create your GUI on several panels and use the other layout managers as appropriate to get the exact effect you want. JavaSoft's AWT team project leader has said that eventually another layout manager will be added that does similar things to GBL, but is more intuitive. Bottom line: nobody has to waste any effort on GBL, there are better alternatives available.
Using GridBagLayout
The GridBagLayout constructor is trivial, GridBagLayout() with no
arguments. You use it like this:
GridBagLayout
gbl = new GridBagLayout();
Unlike the GridLayout()
constructor, this does not say how many rows or columns there will be. This is
determined by the cells your program refers to. If you put a component in row 8
and column 2, then Java will make sure there are at least nine rows and three
columns. (Rows and columns start counting at zero.) If you later put a
component in row 10 and column 4, Java will add the necessary extra rows and
columns. You may have a picture in your mind of the finished grid, but Java
does not need to know this when you create a GridBagLayout.
Unlike most other LayoutManagers
you should not create a GridBagLayout inside a call to setLayout(). You will need access to the
GridBagLayout object later in the applet when you add components to the
container.
Using GridBagLayout
The GridBagLayout constructor is trivial, GridBagLayout() with no
arguments. You use it like this:
GridBagLayout gbl = new GridBagLayout();
Unlike the GridLayout()
constructor, this does not say how many rows or columns there will be. This is
determined by the cells your program refers to. If you put a component in row 8
and column 2, then Java will make sure there are at least nine rows and three
columns. (Rows and columns start counting at zero.) If you later put a
component in row 10 and column 4, Java will add the necessary extra rows and
columns. You may have a picture in your mind of the finished grid, but Java
does not need to know this when you create a GridBagLayout.
Unlike most other LayoutManagers
you should not create a GridBagLayout inside a call to setLayout(). You will need access to the
GridBagLayout object later in the applet when you add components to the
container.
A Grid for the Calculator
Here's a grid you can use to layout the calculator applet. Notice that there are more cells than there are components in the calculator. Some of the components in the calculator occupy more than one cell of the grid. For example, the TextField occupies the four cells (0, 0), (1, 0), (2, 0), and (3, 0).
|
(0, 0) |
(1, 0) |
(2, 0) |
(3, 0) |
|
(0, 1) |
(1, 1) |
(2, 1) |
(3. 1) |
|
(0, 2) |
(1, 2) |
(2, 2) |
(3, 2) |
|
(0, 3) |
(1, 3) |
(2, 3) |
(3, 3) |
|
(0, 4) |
(1, 4) |
(2, 4) |
(3, 4) |
|
(0, 5) |
(1, 5) |
(2, 5) |
(3, 5) |
gridx and gridy
The gridx and gridy fields
specify the x and y coordinates of the cell at the upper left of the Component's
display area. The upper-left-most cell has coordinates (0, 0). The mnemonic
constant GridBagConstraints.RELATIVE specifies that the Component is placed immediately to the
right of (gridx) or immediately below (gridy) the previous Component
added to this container.
The calculator's display starts at the upper left hand corner of the applet. Thus its gridx and gridy members are set like this
displayConstraints.gridx = 0; displayConstraints.gridy = 0;The zero key would have
displayConstraints.gridx = 0; displayConstraints.gridy = 5;gridwidth and gridheight
The gridwidth
and gridheight fields specify the number of cells in a row (gridwidth)
or column (gridheight) in the Component's display area. The mnemonic constant GridBagConstraints.REMAINDER specifies that the Component should use all remaining cells
in its row (for gridwidth) or column (for gridheight). The mnemonic constant GridBagConstraints.RELATIVE specifies that the Component should fill all but the last
cell in its row (gridwidth) or column (gridheight).
The calculator's display is four cells wide and one cell high so it's set like this
displayConstraints.gridwidth = 4; displayConstraints.gridheight = 1;The equals key is two cells high and one wide so it's set like this
displayConstraints.gridwidth = 1; displayConstraints.gridheight = 2;fill
The GridBagConstraints fill field determines whether and how a component is resized if the
component's display area is larger than the component itself. The mnemonic
constants you use to set this variable are
·
GridBagConstraints.NONE: Don't resize the component
·
GridBagConstraints.HORIZONTAL: Make the component wide enough to fill the display area, but don't
change its height.
·
GridBagConstraints.VERTICAL: Make the component tall enough to fill its display area, but don't
change its width.
·
GridBagConstraints.BOTH: Resize the component enough to completely fill its display area
both vertically and horizontally.
For the display area of the calculator screen use
displayConstraints.fill =
GridBagConstraints.HORIZONTAL;
because you'd like the screen to show as many digits as it can.
ipadx and ipady
Each component has a minimum width and a minimum height, smaller than which it will not be. If the component's minimum size is smaller than the component's display area, then only part of the component will be shown.
The ipadx and ipady fields
let you increase this minimum size by padding the edges of the component with
extra pixels. For instance setting ipadx to two will
guarantee that the component is at least four pixels wider than its normal
minimum. (ipadx adds two pixels to each side.) This is not needed for the
Calculator applet.
insets
The insets field
is an instance of the java.awt.Insets class. It specifies the padding between the component and the edges
of its display area. For all the keys in the calculator applet the insets are
set like this:
GBC_equals.insets = new Insets(3, 3, 3, 3);
which provides six pixels of space between each adjacent pair of keys (three from each key).
anchor
When a component is smaller than
its display area, the anchor field specifies where to place it in the grid cell. The mnemonic
constants you use for this purpose are similar to those used in a BorderLayout
but a little more specific. They are
·
GridBagConstraints.CENTER
·
GridBagConstraints.NORTH
·
GridBagConstraints.NORTHEAST
·
GridBagConstraints.EAST
·
GridBagConstraints.SOUTHEAST
·
GridBagConstraints.SOUTH
·
GridBagConstraints.SOUTHWEST
·
GridBagConstraints.WEST
·
GridBagConstraints.NORTHWEST
The default is GridBagConstraints.CENTER. This is not explicitly set in the calculator applet, because the
components are large enough, relative to their display areas, that it really
doesn't matter where they go and the default of center is fine.
weightx and weighty
The weightx and weighty
fields determine how the cells are distributed in the container when the total
size of the cells is less than the size of the container. With weights of zero
(the default) the cells all have the minimum size they need, and everything
clumps together in the center. All the extra space is pushed to the edges of
the container.
A GridBagLayout Example
import java.applet.Applet;
import java.awt.*;
public class GridBagCalculator extends Applet {
public void init() {
GridBagCalculatorFrame gcf = new GridBagCalculatorFrame();
gcf.resize(100, 300);
gcf.show();
}
}
class GridbagCalculatorFrame extends Frame {
public static void main(String args[]) {
GridBagCalculator a = new GridBagCalculator();
a.init();
a.start();
Frame appletFrame = new Frame("Applet Window");
appletFrame.add("Center", a);
appletFrame.resize(150,200);
appletFrame.move(120,100);
appletFrame.show();
}
public void init () {
GridBagLayout gbl = new GridBagLayout();
setLayout(gbl);
// Add the display to the top four cells
GridBagConstraints GBC_display = new GridBagConstraints();
GBC_display.gridx = 0;
GBC_display.gridy = 0;
GBC_display.gridwidth = 4;
GBC_display.gridheight = 1;
GBC_display.fill = GridBagConstraints.HORIZONTAL;
// add the text field
TextField display = new TextField(12);
gbl.setConstraints(display, GBC_display);
add(display);
// Add the clear button
GridBagConstraints GBC_clear = new GridBagConstraints();
GBC_clear.gridx = 0;
GBC_clear.gridy = 1;
GBC_clear.gridwidth = 1;
GBC_clear.gridheight = 1;
GBC_clear.fill = GridBagConstraints.BOTH;
GBC_clear.insets = new Insets(3, 3, 3, 3);
// add the button
Button clear = new Button("C");
gbl.setConstraints(clear, GBC_clear);
add(clear);
// Add the equals button
GridBagConstraints GBC_equals = new GridBagConstraints();
GBC_equals.gridx = 1;
GBC_equals.gridy = 1;
GBC_equals.gridwidth = 1;
GBC_equals.gridheight = 1;
GBC_equals.fill = GridBagConstraints.BOTH;
GBC_equals.insets = new Insets(3, 3, 3, 3);
// add the = button
Button equals = new Button("=");
gbl.setConstraints(equals, GBC_equals);
add(equals);
// Add the / button
GridBagConstraints GBC_slash = new GridBagConstraints();
GBC_slash.gridx = 2;
GBC_slash.gridy = 1;
GBC_slash.gridwidth = 1;
GBC_slash.gridheight = 1;
GBC_slash.fill = GridBagConstraints.BOTH;
GBC_slash.insets = new Insets(3, 3, 3, 3);
// add the button
Button slash = new Button("/");
gbl.setConstraints(slash, GBC_slash);
add(slash);
// Add the * button
GridBagConstraints GBC_times = new GridBagConstraints();
GBC_times.gridx = 3;
GBC_times.gridy = 1;
GBC_times.gridwidth = 1;
GBC_times.gridheight = 1;
GBC_times.fill = GridBagConstraints.BOTH;
GBC_times.insets = new Insets(3, 3, 3, 3);
// add the button
Button star = new Button("*");
gbl.setConstraints(star, GBC_times);
add(star);
// Add the 7 key
GridBagConstraints GBC_7 = new GridBagConstraints();
GBC_7.gridx = 0;
GBC_7.gridy = 2;
GBC_7.gridwidth = 1;
GBC_7.gridheight = 1;
GBC_7.fill = GridBagConstraints.BOTH;
GBC_7.insets = new Insets(3, 3, 3, 3);
// add the button
Button b7 = new Button("7");
gbl.setConstraints(b7, GBC_7);
add(b7);
// Add the 8 key
GridBagConstraints GBC_8 = new GridBagConstraints();
GBC_8.gridx = 1;
GBC_8.gridy = 2;
GBC_8.gridwidth = 1;
GBC_8.gridheight = 1;
GBC_8.fill = GridBagConstraints.BOTH;
GBC_8.insets = new Insets(3, 3, 3, 3);
// add the button
Button b8 = new Button("8");
gbl.setConstraints(b8, GBC_8);
add(b8);
// Add the 9 key
GridBagConstraints GBC_9 = new GridBagConstraints();
GBC_9.gridx = 2;
GBC_9.gridy = 2;
GBC_9.gridwidth = 1;
GBC_9.gridheight = 1;
GBC_9.fill = GridBagConstraints.BOTH;
GBC_9.insets = new Insets(3, 3, 3, 3);
// add the button
Button b9 = new Button("9");
gbl.setConstraints(b9, GBC_9);
add(b9);
// Add the - key
GridBagConstraints GBC_minus = new GridBagConstraints();
GBC_minus.gridx = 3;
GBC_minus.gridy = 2;
GBC_minus.gridwidth = 1;
GBC_minus.gridheight = 1;
GBC_minus.fill = GridBagConstraints.BOTH;
GBC_minus.insets = new Insets(3, 3, 3, 3);
// add the button
Button minus = new Button("-");
gbl.setConstraints(minus, GBC_minus);
add(minus);
// Add the 4 key
GridBagConstraints GBC_4 = new GridBagConstraints();
GBC_4.gridx = 0;
GBC_4.gridy = 3;
GBC_4.gridwidth = 1;
GBC_4.gridheight = 1;
GBC_4.fill = GridBagConstraints.BOTH;
GBC_4.insets = new Insets(3, 3, 3, 3);
// add the button
Button b4 = new Button("4");
gbl.setConstraints(b4, GBC_4);
add(b4);
// Add the 5 key
GridBagConstraints GBC_5 = new GridBagConstraints();
GBC_5.gridx = 1;
GBC_5.gridy = 3;
GBC_5.gridwidth = 1;
GBC_5.gridheight = 1;
GBC_5.fill = GridBagConstraints.BOTH;
GBC_5.insets = new Insets(3, 3, 3, 3);
// add the button
Button b5 = new Button("5");
gbl.setConstraints(b5, GBC_5);
add(b5);
// Add the 6 key
GridBagConstraints GBC_6 = new GridBagConstraints();
GBC_6.gridx = 2;
GBC_6.gridy = 3;
GBC_6.gridwidth = 1;
GBC_6.gridheight = 1;
GBC_6.fill = GridBagConstraints.BOTH;
GBC_6.insets = new Insets(3, 3, 3, 3);
// add the button
Button b6 = new Button("6");
gbl.setConstraints(b6, GBC_6);
add(b6);
// Add the + key
GridBagConstraints GBC_plus = new GridBagConstraints();
GBC_plus.gridx = 3;
GBC_plus.gridy = 3;
GBC_plus.gridwidth = 1;
GBC_plus.gridheight = 1;
GBC_plus.fill = GridBagConstraints.BOTH;
GBC_plus.insets = new Insets(3, 3, 3, 3);
// add the button
Button plus = new Button("+");
gbl.setConstraints(plus, GBC_plus);
add(plus);
// Add the 1 key
GridBagConstraints GBC_1 = new GridBagConstraints();
GBC_1.gridx = 0;
GBC_1.gridy = 4;
GBC_1.gridwidth = 1;
GBC_1.gridheight = 1;
GBC_1.fill = GridBagConstraints.BOTH;
GBC_1.insets = new Insets(3, 3, 3, 3);
// add the button
Button b1 = new Button("1");
gbl.setConstraints(b1, GBC_1);
add(b1);
// Add the 2 key
GridBagConstraints GBC_2 = new GridBagConstraints();
GBC_2.gridx = 1;
GBC_2.gridy = 4;
GBC_2.gridwidth = 1;
GBC_2.gridheight = 1;
GBC_2.fill = GridBagConstraints.BOTH;
GBC_2.insets = new Insets(3, 3, 3, 3);
// add the button
Button b2 = new Button("2");
gbl.setConstraints(b2, GBC_2);
add(b2);
// Add the 3 key
GridBagConstraints GBC_3 = new GridBagConstraints();
GBC_3.gridx = 2;
GBC_3.gridy = 4;
GBC_3.gridwidth = 1;
GBC_3.gridheight = 1;
GBC_3.fill = GridBagConstraints.BOTH;
GBC_3.insets = new Insets(3, 3, 3, 3);
// add the button
Button b3 = new Button("3");
gbl.setConstraints(b3, GBC_3);
add(b3);
// Add the = key
GridBagConstraints GBC_bigequals =
new GridBagConstraints();
GBC_bigequals.gridx = 3;
GBC_bigequals.gridy = 4;
GBC_bigequals.gridwidth = 1;
GBC_bigequals.gridheight = 2;
GBC_bigequals.fill = GridBagConstraints.BOTH;
GBC_bigequals.insets = new Insets(3, 3, 3, 3);
// add the button
Button bigequals = new Button("=");
gbl.setConstraints(bigequals, GBC_bigequals);
add(bigequals);
// Add the 0 key
GridBagConstraints GBC_0 = new GridBagConstraints();
GBC_0.gridx = 0;
GBC_0.gridy = 5;
GBC_0.gridwidth = 2;
GBC_0.gridheight = 1;
GBC_0.fill = GridBagConstraints.BOTH;
GBC_0.insets = new Insets(3, 3, 3, 3);
// add the button
Button b0 = new Button("0");
gbl.setConstraints(b0, GBC_0);
add(b0);
// Add the . key
GridBagConstraints GBC_decimal = new GridBagConstraints();
GBC_decimal.gridx = 2;
GBC_decimal.gridy = 5;
GBC_decimal.gridwidth = 1;
GBC_decimal.gridheight = 1;
GBC_decimal.fill = GridBagConstraints.BOTH;
GBC_decimal.insets = new Insets(3, 3, 3, 3);
// add the button
Button bdecimal = new Button(".");
gbl.setConstraints(bdecimal, GBC_decimal);
add(bdecimal);
}
public Insets insets() {
return new Insets(5, 5, 5, 5);
}
}
Manually Positioning Components
It is possible to precisely position widgets on the screen using x and y pixel coordinates that are relative to the applet's panel. Before you get the details you should hear why this is a bad idea:
· Not every instance of your applet will have the same size panel to work with. You should only do this when the applet will only run on your web pages so you can control the applet's size. Free-standing windows may even be resized by the user on the fly. If you've used a layout manager to position your components, they'll be adjusted immediately to fit the new window size. This behavior is extremely hard to duplicate if you don't use a layout manager.
· Components use varying amounts of space on different platforms. You should probably only use these techniques when you are writing a single-platform, compiled Java application. You should not use them for applets.
· Laying out components manually is a lot of work, especially given the lack of Visual Basic like interface drawing environments. Don't you have better things to do with your time than moving widgets one pixel to the left, recompiling and running the applet only to discover the widget was probably better off where it started out?
·
The GridBagLayout and/or
nested panels can probably do everything you want to do with manual layout
anyway.
How to Manually Position Components
If none of those
things convince you that you really shouldn't use absolute positioning, I'll
let you in on the secret: pass null to setLayout(), that is
call
setLayout(null);Then move and
resize each of your components to their desired locations and sizes in the paint()
method using setLocation() and setSize():
public void setLocation(int x, int y)public void setSize(int width, int height)where x and y are the
coordinates of the upper left hand corner of the bounding box of your component
and width and height are the width and height in pixels of the bounding box of your
component.
This applet that puts a button precisely 30 pixels wide by 40 pixels high at the point (25, 50):
import java.applet.*;
import java.awt.*;
public class ManualLayout extends Applet {
private boolean laidOut = false;
private Button myButton;
public void init() {
this.setLayout(null);
this.myButton = new Button("OK");
this.add(this.myButton);
}
public void paint(Graphics g) {
if (!this.laidOut) {
this.myButton.setLocation(25, 50);
this.myButton.setSize(30, 40);
this.laidOut = true;
}
}
}
What is a Container?
A container is a
component which can contain other components inside itself. It is also an
instance of a subclass of java.awt.Container. java.awt.Container extends java.awt.Component so containers are themselves components.
In general components are contained in a container. An applet is a container. Other containers include windows, frames, dialogs, and panels. Containers may contain other containers.
Every container has a LayoutManager that determines how different components are positioned within the
container.
In short containers contain
components. Components are positioned inside the container according to a
LayoutManager. Since containers are themselves components, containers may by
placed inside other containers. This is really a lot simpler than it sounds.
Applets provide a ready-made container and a default LayoutManager, a FlowLayout.
The Two Kinds of Containers
The AWT defines two different kinds of containers, panels and windows.
Panels are subclasses of java.awt.Panel. A panel is contained inside another container, or perhaps inside
the web browser's window. Panels do not stand on their own. Applets are panels.
Windows are subclasses of java.awt.Window. A window is a free-standing, native window. There are two kinds of
windows: frames and dialogs. A frame is an instance of a subclass of java.awt.Frame. It represents a normal, native window. A dialog is a subclass of java.awt.Dialog. A dialog is a transitory window that exists merely to impart some
information or get some input from the user.
Panels
A Panel is a
fairly generic Container whose primary purpose is to subdivide the drawing area into
separate rectangular pieces. Since each Panel can have its own LayoutManager, you can do many things with panels that you can't do with a single
LayoutManager.
For example, suppose you want a TextArea in
the center of an applet with a Button below, like this:
There's no single LayoutManager that will produce this. A BorderLayout will
expand the Button to fill the entire width of the applet. A FlowLayout
won't make the TextArea big enough.
Panels
Instead of
either of these options, we can create the applet with a BorderLayout
and put the TextArea in its center. Then we create a Panel, set the LayoutManager of the Panel to FlowLayout, add the button to the panel, and then add the panel to the south
part of the applet. Indeed that's exactly what was done to produce the above
applet. Here's the code:
import java.applet.*;
import java.awt.*;
public class PanelExample extends Applet {
public void init() {
this.setLayout(new BorderLayout());
this.add("Center", new TextArea());
Panel p = new Panel();
p.setLayout(new FlowLayout(FlowLayout.CENTER));
p.add(new Button("OK"));
this.add("South", p);
}
}
It's important
in this example to distinguish between adding to the applet (add(...) or this.add(...)) and adding to the panel (p.add(...) ).
On the other hand it doesn't matter whether you add the panel to the applet and then add the button to the panel, or first add the button to the panel and then add the panel to the applet.
Another common use for a panel
is to align a series of checkboxes in a GridLayout with one
column.
Nesting Panels
Sometimes what's
needed is multiple instances of the same LayoutManager. For
instance consider the calculator applet again.
On the one hand this looks like
it should be simple to implement in Java. After all it's just eighteen buttons
and a TextField. On the other hand although most of the keys are the same size, two
of the keys and the TextField are oversized. You could almost use a GridLayout,
but not quite. Panels are one way to solve this problem.
Nesting Panels
Consider this picture. First a calculator is broken up into a grid of one column and three rows. Put a Panel in each of those cells. Panel A1 will contain the TextField and the top four keys. panel A2 will contain the middle two rows of keys, and panel A3 will contain the bottom two rows of keys.
The eight keys in the middle panel A2 are all the same size. Therefore you can use a GridLayout with two rows and four columns in it. However this isn't true for A1 and A3, so let's continue. Split panel A1 into a grid of two rows and one column. The top cell will be used for the TextField display. However the bottom cell still needs to be split into four pieces so add Panel B1. The bottom is more complex still. Split it into a grid of one row and two columns and put panels B2 and B3 there.
Panel B1 contains four keys, all the same size so put a grid of one row and four columns there, and add those keys. Next split Panel B2 into two rows and one column. Put the oversized zero key in the second cell and Panel C1 in the first. Next split B3 into two columns and one row. Put a panel in the first cell and the oversized equals key in the second.
Finally split C1 into two columns and one row and put the one and two keys there. Then split C2 into two rows and one column for the three and decimal point keys.
A Calculator with Panels
Here's the source code that
produces a calculator applet, using only a GridLayout and nested
panels. Whether this is easier or harder than using a GridBagLayout is a personal preference.
import java.applet.*;
import java.awt.*;
public class Calculator extends Applet {
private TextField screen;
public void init () {
this.setLayout(new GridLayout(3, 1, 3, 3));
Panel A1 = new Panel();
this.add(A1);
Panel A2 = new Panel();
this.add(A2);
Panel A3 = new Panel();
this.add(A3);
A1.setLayout(new GridLayout(2, 1));
screen = new TextField(12);
A1.add(screen);
Panel B1 = new Panel();
B1.setLayout(new GridLayout(1, 4, 3, 3));
B1.add(new Button("C"));
B1.add(new Button("="));
B1.add(new Button("/"));
B1.add(new Button("*"));
A1.add(B1);
A2.setLayout(new GridLayout(2, 4, 3, 3));
A2.add(new Button("7"));
A2.add(new Button("8"));
A2.add(new Button("9"));
A2.add(new Button("-"));
A2.add(new Button("4"));
A2.add(new Button("5"));
A2.add(new Button("6"));
A2.add(new Button("+"));
A3.setLayout(new GridLayout(1, 2, 3, 3));
// 1, 2 and 0
Panel B2 = new Panel();
B2.setLayout(new GridLayout(2, 1, 3, 3));
// 1 and 2
Panel C1 = new Panel();
C1.setLayout(new GridLayout(1, 2, 3, 3));
C1.add(new Button("1"));
C1.add(new Button("2"));
B2.add(C1);
B2.add(new Button("0"));
// 3, . and =
Panel B3 = new Panel();
B3.setLayout(new GridLayout(1, 2, 3, 3));
// 3 and .
Panel C2 = new Panel();
C2.setLayout(new GridLayout(2, 1, 3, 3));
C2.add(new Button("3"));
C2.add(new Button("."));
B3.add(C2);
B3.add(new Button("="));
A3.add(B2);
A3.add(B3);
}
public Insets insets() {
return new Insets(5, 5, 5, 5);
}
/* Use 1.0 event handling since I need to run this
inside today's web browsers. */
public boolean action(Event e, Object arg) {
if (e.target instanceof Button) {
screen.setText((String) arg);
return true;
}
return false;
}
}
Windows
The java.awt.Window class and its subclasses let you create free-standing windows.
Stand-alone windows can also be used to build applications that use the AWT
instead of the command-line or to provide additional space for applets.
A Window is a subclass of
java.awt.Container that is independent of other containers. That is, a Window is
not itself contained. Since Window extends java.awt.Container you can add components like Buttons and TextFields
to Windows. You can arrange the Components you add with a LayoutManager. You can draw directly into a Window in a paint()
method. Everything you do in an applet panel can also be done in a Window.
Normally you Don't use the Window class
directly. Instead you use one of its subclasses, either java.awt.Frame or java.awt.Dialog depending on your need. A Frame is what most
people think of as a window in their native environment. It can have a menu
bar; it can be independently moved and resized; and it will hang around on the
screen as long as the user is interested in the content of the window.
A Dialog will not have a
menu bar. It can be moved but often can't be resized. Its purpose is to get
some particular information from the user (input) or to impart some
particularly important information to the user (output). It is normally visible
on the screen only until it gets the input or receives acknowledgement from the
user about its output.
Frames
Frames are very useful in more
complex applications. Frames let you separate different functions or data into
different windows. For instance a painting application may have several different
pictures in varying states of completion open in different windows. Or it may
have only one picture but a separate window might contain a tool palette to
select different brushes or colors. Each of these windows would be a Frame.
Everything you need to create
and work with frames is contained in the java.awt.Frame class.
To create a new frame without a title bar use the Frame()
constructor with no arguments.
Frame
f = new Frame();
More commonly you'll want to name the frame so pass the constructor a string that specifies the window's title.
Frame
f = new Frame("My Window");
Frames inherit from java.awt.Container so you can add components to a frame. Unlike panels and applets,
the default LayoutManager for a frame is BorderLayout, not FlowLayout. However you can change this using the frame's setLayout()
method like this:
f.setLayout(new
FlowLayout());
Frames inherit from java.awt.Component so they have paint() and update() methods. If you want to draw in the frame and process events
manually like you did in applets, just create a subclass of Frame and
add listener objects to it. Almost everything you did in those chapters with a
user-defined subclass of java.awt.Applet can also be done with a user-defined subclass of java.awt.Frame.
However most of the time you'll
prefer to use components. To add a component to a frame call the frame's add() method
just as you would call an applet's add() method. The only
difference is that you may often call the add() method from
outside the Frame class so you'll need to prefix add with a variable that points to
the frame and the member operator. In other words given
a Frame f, you need to call
f.add(new
Button("OK");
rather than simply
this.add(new
Button("OK"));
Of course this depends on what
class you're inside of when you call add(). If you're
calling add() from one of the Frame subclass's own methods you won't
need to do this.
Since the default layout for a
frame is BorderLayout, you should specify whether you want the component added to the
North, South, East, West or Center. Here's how you'd add a centered label to
the center of Frame f:
f.add("Center",
new Label("This is a frame", Label.CENTER));
The size and position of any
given frame is unpredictable unless you specify it. Specifying the size is easy.
Just call the frame's setSize() method like this
f.setSize(150,150);
This size does not include the
title bar so you'll need to account for that separately. To determine the
height of a Frame's title bar call its insets() method and
look at the top member of the resulting java.awt.Insets object.
That will be the height of the title bar. That is,
int titleBarHeight = f.insets().top;
Moving the Frame to the
proper place on the screen takes a little more effort. You move a Frame with
the setLocation(int x,
int y) method. However x and y are relative to
the screen, not to the applet.
When a window is first created,
it's invisible. Add components to the Frame while it's still
invisible. The effect of Buttons, Labels and other widgets popping onto a layout
in rapid succession while the window jumps around and changes size can be quite
disconcerting. When you're done adding components, resizing and moving the Frame, make
it visible by calling its show() method like so:
f.show();
Frame Example
What follows is
a very simple program that puts up a window. You can move the window and resize
it. The window has a single TextArea component that lets you edit
some text.
import java.awt.*;
public class FrameTester {
public static void main(String[] args) {
Frame myFrame = new Frame("My Frame");
myFrame.setSize(250, 250);
myFrame.setLocation(300,200);
myFrame.add("Center", new TextArea(10, 40));
myFrame.show();
}
}
This window cannot be closed because it does not yet
respond to the WINDOW_CLOSING event.
Centering a Frame on the Screen
import java.awt.*;
public class CenteredFrameTester {
public static void main(String[] args) {
Frame myFrame = new Frame("My Frame");
myFrame.setSize(250, 250);
Toolkit kit = myFrame.getToolkit();
Dimension screenSize = kit.getScreenSize();
int screenWidth = screenSize.width;
int screenHeight = screenSize.height;
Dimension windowSize = myFrame.getSize();
int windowWidth = windowSize.width;
int windowHeight = windowSize.height;
int upperLeftX = (screenWidth - windowWidth)/2;
int upperLeftY = (screenHeight - windowHeight)/2;
myFrame.setLocation(upperLeftX, upperLeftY);
myFrame.add("Center", new TextArea(10, 40));
myFrame.show();
}
}
In practice I would combine several of these steps.
Window Events
Since java.awt.Window is a subclass of java.awt.Component, a Window, Frame or Dialog can
fire events. In particular it fires WindowEvents. There are
seven of these:
·
WindowEvent.WINDOW_ACTIVATED
·
WindowEvent.WINDOW_CLOSED
·
WindowEvent.WINDOW_CLOSING
·
WindowEvent.WINDOW_DEACTIVATED
·
WindowEvent.WINDOW_DEICONIFIED
·
WindowEvent.WINDOW_ICONIFIED
·
WindowEvent.WINDOW_OPENED
To respond to these events you
register a WindowListener object with the window. The object must implement the WindowListener interface and include these methods:
public void windowOpened(WindowEvent e) public void windowClosing(WindowEvent e) public void windowClosed(WindowEvent e) public void windowIconified(WindowEvent e) public void windowDeiconified(WindowEvent e) public void windowActivated(WindowEvent e) public void windowDeactivated(WindowEvent e)Window Events Example
For example,
windows don't close on their own. You have to explicitly close them. The following
subclass of Frame puts up a window that responds to efforts to close it by calling setVisible(false) and dispose().
import java.awt.*;
import java.awt.event.*;
public class ClosableFrame extends Frame implements WindowListener {
public ClosableFrame() {
this.addWindowListener(this);
}
public ClosableFrame(String s) {
super(s);
this.addWindowListener(this);
}
public void windowClosing(WindowEvent e) {
this.setVisible(false);
this.dispose();
}
public void windowOpened(WindowEvent e) {}
public void windowClosed(WindowEvent e) {}
public void windowIconified(WindowEvent e) {}
public void windowDeiconified(WindowEvent e) {}
public void windowActivated(WindowEvent e) {}
public void windowDeactivated(WindowEvent e) {}
}
Combining Applets and Applications
An applet needs a frame to run in. Normally the web browser or the applet viewer provides this. However you can create instances of your applet inside a frame of your own creation. This way you can write code that is both an applet and an application.
To convert an applet into an
application, add the following main() method to your applet:
public static void main(String args[]) {
Applet a = new MyAppletClass();
a.init();
a.start();
Frame appletFrame = new Frame("Applet Window");
appletFrame.add("Center", a);
appletFrame.setSize(150,150);
appletFrame.setLocation(100,100);
appletFrame.show();
}
Line 1 is the standard main()
method you're used to from all the command line applications. If the applet is
running in a web browser or an applet viewer, this method will not be called.
It will only be executed if you start the applet as a stand-alone program.
Line 3 creates a new instance of
the applet. This assumes that the applet is called myApplet.
You should of course change that to match the name of your applet subclass.
After you create the applet,
lines 4 and 5 call the applet's init() and start()
methods. Normally the web browser or applet viewer does this for you, but
you're not running inside such a program so you need to do it yourself.
After the applet has been
created, it's necessary to create a Frame to hold it. Line
7 does this with the normal Frame() constructor. You can change the
title of the Frame to suit your application.
Line 8 adds the applet to the Frame. Since
the default LayoutManager for a Frame is BorderLayout you add it to the center. Remember that java.applet.Applet is a subclass of java.awt.Component so adding an applet
to a Frame is kosher.
Line 9 resizes the Frame. Here
the size is arbitrarily set to 150 pixels by 150 pixels. If this program were
running as an applet, you'd get those numbers from the height and width
parameters; but you're not running in an applet so you have to make something
up. If you like you could make it possible to enter the height and width as
command line arguments.
Line 10 moves the Frame to
(100, 100). If you don't do this the exact location of the Frame is
unpredictable, but on some machines it has a distressing tendency to show up
not only partially off the screen, but with the title bar completely off the
screen so there's no way to move it onto the screen.
Line 11 makes the Frame
visible, and the applet is now ready to run, without an applet viewer or a web
browser.
Warning: Even with a Frame applets and applications are still different. When you convert an
applet to an application in this fashion, you need to make sure your program
doesn't rely on methods that only make sense in the context of an applet. For
instance you can only read parameters using getParameter() in an
applet. Conversely you can only read the command line arguments in an
application. Furthermore applications have many fewer security restrictions
than applets so code that may run well in an application may throw many security
related exceptions in an applet.
Dialogs
Frames are useful for windows
that will stick around for awhile, some text that's being edited for instance. Dialogs are
more transitory. They're used for simple user input or for quick alerts to the
user.
Like java.awt.Frame, java.awt.Dialog is a subclass of java.awt.Window and hence of java.awt.Container and java.awt.Component. Therefore a lot of what you learned about frames applies to
dialogs as well. You move them, resize them and add to them almost exactly as
you do frames. There are three main differences between dialogs and frames:
1. A frame can have a menu bar. A dialog cannot.
2. A dialog can be modal. A frame cannot.
3. A dialog has a parent frame. A frame does not.
Menu bars are covered next class. Right now let's talk about modal versus non-modal dialogs. A modal dialog blocks all other use of the application until the user responds to it. A modal dialog cannot be moved and does not allow the user to switch to another window in the same program. On some platforms the user may not even be able to switch to another program.
In the 1970's a computer virus worked its way into several early timesharing systems. The computer program would periodically break in on a user's session and say "I WANT A COOKIE." The terminal would then refuse to respond to any user input until the user typed the word "COOKIE" at which point the program would say something like "MMM, MMM, THAT WAS GOOD." and return control to the user.
Modal dialogs are a lot like the cookie monster program. They request input from the user and don't let anything else happen until they get it. Non-modal dialogs pop-up but they don't prevent the user from doing other things while they're visible. Because modal dialogs inconvenience users by forcing them to respond when the computer wants them to rather than when they want to, their use should be kept to a minimum.
Methods of Dialogs
Since Dialog and Frame are
both subclasses of Window, they share many methods including setLocation() and setSize().
The only methods that are significantly different between a dialog and a frame
are the constructors. The constructors for Dialog all provide a
non-null parent window and some have an option to set modality:
public Dialog(Frame owner)public Dialog(Frame owner, boolean modal)public Dialog(Frame owner, String title)public Dialog(Frame owner, String title, boolean modal)There are several more constructors in Java 1.2 and later, but this will be enough for us for now.
For example,
Dialog
d = new Dialog(someFrame, false);
The modal
argument specifies whether or not the dialog should be modal. If it should be,
pass true. If it shouldn't be, pass false.
There are also some common differences between most frames and most dialogs, but these are not written in stone:
- Most Frames can be moved and resized by the user. Most Dialogs cannot be.
- Most Frames have title bars. Most Dialogs do not.
You can make a dialog resizable
and movable by calling its setResizable() method with a boolean value of true like this:
d.setResizable(true);
You can give a dialog a title bar by adding the title string to the constructor:
Dialog d = new Dialog(parentFrame, "My Dialog
Window", false);
All the other methods of the Dialog class
are exactly the same as they are for Frames. You resize them
the same way. You move them the same way. You make them visible the same way.
You add components to them the same way.
Examples of Dialogs
The following program displays a simple non-modal dialog with an OK Button and no title-bar.
import java.applet.*;
import java.awt.*;
public class DialogTester extends Applet {
public void init() {
Container container = this.getParent();
while (! (container instanceof Frame)) container = container.getParent();
Frame parent = (Frame) container;
Dialog myDialog = new Dialog(parent, false);
myDialog.setLocation(320,240);
myDialog.add("North", new Label("Hello!"));
myDialog.add("South", new Button("OK"));
myDialog.pack();
myDialog.show();
}
}
Subclassing java.awt.Dialog
The previous
example was a little artificial. Normally you create your own subclass of Dialog and
instantiate that subclass from the main program. For example one of the simpler
common dialogs is a notification dialog that gives the user a message to which
they can say OK to signify that they've read it. The following program is such
a Dialog subclass.
import java.awt.*;
import java.awt.event.*;
import java.applet.*;
public class YesNoDialog extends Dialog implements ActionListener {
public YesNoDialog(Frame parent, String message) {
super(parent, true);
this.add("Center", new Label(message));
Panel p = new Panel();
p.setLayout(new FlowLayout());
Button yes = new Button("Yes");
yes.addActionListener(this);
p.add(yes);
Button no = new Button("No");
no.addActionListener(this);
p.add(no);
this.add("South", p);
this.setSize(300,100);
this.setLocation(100, 200);
this.pack();
}
public void actionPerformed(ActionEvent e) {
this.hide();
this.dispose();
}
}
class AlertExample extends Applet {
public void init () {
Container container = this.getParent();
while (! (container instanceof Frame)) container = container.getParent();
Frame parent = (Frame) container;
Dialog d = new YesNoDialog(parent,
"Are you sure you want to start global thermonuclear war?");
d.show();
}
}
What is a Menu?
Menus are composed of three hierarchical pieces. The menu bar contains the various menus. The menu bar is at the top of the screen on a Macintosh and in the top of the window in Windows and Motif.
![]()
Each menu bar contains one or more menus. Menus are organized topically. File would be one menu. Edit would be another.
Each menu contains one or more menu items. The menu items are the individual actions such as Open, Print, Cut or Copy. They are not shown except when the menu is active. No more than one menu will be active at a time.

This Edit menu has a disabled Undo menu item followed by a separator, followed by enabled Cut, Copy, paste and Clear menu items, followed by another separator, followed by an enabled Select All menu item.
The Menu Classes
The AWT contains four main classes to handle menus:
java.awt.Menujava.awt.MenuBarjava.awt.MenuItemjava.awt.PopupMenu
T o use menus in
your application you need to add instances of all three classes, one MenuBar with
one or more Menus, each with several MenuItems.
The java.awt.MenuComponent class is the ultimate superclass of all these classes. MenuComponent extends java.lang.Object. Thus menus, menu bars, and menu items are not components and
cannot be added to containers in the usual fashion.
java.lang.Object | +---java.awt.MenuComponent | +---java.awt.MenuBar | +---java.awt.MenuItem | +---java.awt.Menu | +---java.awt.PopupMenuBoth MenuBar and MenuItem
extend MenuComponent. Menu extends MenuItem. (This sounds a little strange, but if you think about it a menu is
an item in a menu bar.) Furthermore, MenuBar implements the java.awt.MenuContainer interface.
Creating Menus
It's easiest to build the menus before you display them. The typical order is
1.
Create a new MenuBar.
2.
Create a new Menu.
3.
Add items to the Menu.
4. If necessary repeat steps 2 and 3.
5.
Add the MenuBar to the Frame.
The constructors
you need are all simple. To create a new MenuBar object:
MenuBar myMenubar = new MenuBar();To create a new Menu use the
Menu(String title) constructor. Pass it the title of the menu you want. For example,
to create File and Edit menus,
Menu fileMenu = new Menu("File");Menu editMenu = new Menu("Edit");MenuItems are created
similarly with the MenuItem(String
menutext) constructor. Pass it the title of the
menu you want like this
MenuItem Cut = new MenuItem("Cut");You can create MenuItems
inside the Menus they belong to, just like you created widgets inside their
layouts. Menu's have add methods that take an instance of MenuItem.
Here's how you'd build an Edit Menu complete with Undo, Cut, Copy, Paste, Clear
and Select All MenuItems:
Menu editMenu = new Menu("Edit"); editMenu.add(new MenuItem("Undo")); editMenu.addSeparator(); editMenu.add(new MenuItem("Cut")); editMenu.add(new MenuItem("Copy")); editMenu.add(new MenuItem("Paste")); editMenu.add(new MenuItem("Clear")); editMenu.addSeparator(); editMenu.add(new MenuItem("Select All"));The addSeparator() method adds a horizontal line across the menu. It's used to
separate logically separate functions in one menu.
Once you've created the Menus, you
add them to the MenuBar using the MenuBar's add(Menu
m) method like this:
myMenubar.add(fileMenu); myMenubar.add(editMenu);
Finally when the
MenuBar is fully loaded, you add the Menu to a Frame using
the frame's setMenuBar(MenuBar
mb) method. Given a Frame f this
is how you would do it:
f.setMenuBar(myMenuBar);A Menu Example
An application may have dozens,
even hundreds of menu items. Cramming these all into the init()
method gets confusing. It's customary to create separate methods that create
each individual menu and add it to the MenuBar. This program
creates two fairly standard menus, File and Edit.
import java.applet.*;
import java.awt.*;
public class MenuTester extends Applet {
public void init () {
Frame f = new Frame("Simple Window");
f.add("Center", new Label("Look at the Menus", Label.CENTER));
f.setSize(this.getSize().width, this.getSize().height);
f.setLocation(320,240);
MenuBar myMenuBar = new MenuBar();
this.makeFileMenu(myMenuBar);
this.makeEditMenu(myMenuBar);
f.setMenuBar(myMenuBar);
f.show();
}
private void makeEditMenu(MenuBar mb) {
Menu editMenu = new Menu("Edit");
editMenu.add("Undo");
editMenu.addSeparator();
editMenu.add("Cut");
editMenu.add("Copy");
editMenu.add("Paste");
editMenu.add("Clear");
mb.add(editMenu);
}
private void makeFileMenu(MenuBar mb) {
Menu fileMenu = new Menu("File");
fileMenu.add("New");
fileMenu.add("Open...");
fileMenu.addSeparator();
fileMenu.add("Close");
fileMenu.add("Save");
fileMenu.add("Save As...");
fileMenu.addSeparator();
fileMenu.add("Page Setup...");
fileMenu.add("Print");
fileMenu.addSeparator();
fileMenu.add("Quit");
mb.add(fileMenu);
}
}
Menu Events
When the user selects a menu item, the menu item fires an action event. This will be picked up by any action listeners registered on the menuI item. The action command is set to the text of the menu item selected.
For example, the following
applet puts the text of each menu item selected in the text field theChoice.
import java.applet.*;
import java.awt.*;
import java.awt.event.*;
public class ActiveMenuTester extends Applet implements ActionListener {
TextField theChoice = new TextField(20);
public void init () {
Frame f = new Frame("Simple Window");
f.add("North", new Label("Look at the Menus", Label.CENTER));
f.add("South", theChoice);
f.setSize(300, 200);
f.setLocation(220,240);
MenuBar myMenuBar = new MenuBar();
this.makeFileMenu(myMenuBar);
this.makeEditMenu(myMenuBar);
f.setMenuBar(myMenuBar);
f.addWindowListener(new WindowCloser());
f.show();
}
protected void addItem(Menu m, String s) {
MenuItem mi = new MenuItem(s);
mi.addActionListener(this);
m.add(mi);
}
protected void makeEditMenu(MenuBar mb) {
Menu editMenu = new Menu("Edit");
this.addItem(editMenu, "Undo");
editMenu.addSeparator();
this.addItem(editMenu, "Cut");
this.addItem(editMenu, "Copy");
this.addItem(editMenu, "Paste");
this.addItem(editMenu, "Clear");
mb.add(editMenu);
}
protected void makeFileMenu(MenuBar mb) {
Menu fileMenu = new Menu("File");
this.addItem(fileMenu, "New");
this.addItem(fileMenu, "Open...");
fileMenu.addSeparator();
this.addItem(fileMenu, "Close");
this.addItem(fileMenu, "Save");
this.addItem(fileMenu, "Save As...");
fileMenu.addSeparator();
this.addItem(fileMenu, "Page Setup...");
this.addItem(fileMenu, "Print");
fileMenu.addSeparator();
this.addItem(fileMenu, "Quit");
mb.add(fileMenu);
}
public void actionPerformed(ActionEvent e) {
theChoice.setText(e.getActionCommand());
}
class WindowCloser extends WindowAdapter {
public void windowClosing(WindowEvent e) {
Window w = (Window) e.getSource();
w.setVisible(false);
w.dispose();
}
}
}
Menu Shortcuts
Menu shortcuts, also known as menu accelerators and command key equivalents, rarely accelerate anything. Nonetheless users often mistakenly think they do, and so a salable application needs them.
The java.awt.MenuShortcut class represents such a keyboard accelerator. This class has two
constructors:
public MenuShortcut(int key)public MenuShortcut(int key, boolean useShiftModifier)In both cases the key argument
is the raw keycode that will be used to invoke this menu item.
If useShiftModifier is true, then the shift key must be held down for this shortcut to be
activated. useShiftModifier is false by default.
To add an accelerator key to a
menu item, pass a MenuShortcut to the item's setShortcut() method. For example,
MenuShortcut pShortcut = new MenuShortcut(KeyEvent.VK_P);MenuItem mi = new MenuItem("Print...");mi.setShortcut(pShortcut);You can also just pass the shortcut to the MenuItem()
constructor like this:
MenuShortcut pShortcut = new MenuShortcut(KeyEvent.VK_P);MenuItem mi = new MenuItem("Print...", pShortcut);To remove a shortcut, the MenuItem's deleteShortcut() method; for example:
mi.deleteShortcut();
Popup Menus
You've already encountered the Choice class
that implements a popup menu component. Choices are fixed in a particular
location.
The PopupMenu
class, on the other hand, is activated when the user holds the right mouse
button or otherwise indicates that they want to pop up a menu. Typically this
is used for context sensitive menus.
java.awt.PopupMenu is a subclass of of java.awt.Menu. For the most part you use
it just like you use a regular menu. Items are added to it with the add(MenuItem mi) method, and user selections are responded to by installing an
ActionListener on the MenuItem. For example, to build a popup menu with a number of URLs you might
do this:
PopupMenu pm = new PopupMenu();
MenuItem mi = new MenuItem("http://java.sun.com/");
mi.addActionListener(URLActionListener);
pm.add(mi);
mi = new MenuItem("http://home.netscape.com/");
mi.addActionListener(URLActionListener);
pm.add(mi);
mi = new MenuItem("http://www.cafeaulait.org/course/");
mi.addActionListener(URLActionListener);
pm.add(mi);
MenuItem mi = new MenuItem("http://www.yahoo.com/");
mi.addActionListener(URLActionListener);
pm.add(mi);
However PopupMenus
don't belong to any particular MenuBar. Instead they're added to a
component. For example, given a Frame f, you would install the PopupMenu pm
in the frame by passing it to the frame's add() method, like so:
f.add(pm);
(Is this the same add() method
used to add components to a frame?)
The exact trigger for popping up
the menu is platform dependent. For example, on Windows a PopupMenu is
triggered on right mouse button up. However, in Motif a PopupMenu is
triggered on right mouse button down. Regardless of the exact sequence of
events leading to a menu popping up, when the user makes a selection, when a MenuItem is
selected an ActionEvent is fired to any listeners registered for that item.
A PopupMenu can be
deinstalled from a component by passing it to the component's remove()
method like this:
f.remove(pm);No more than one PopupMenu
can be installed in any given component. If a PopupMenu is installed
in a container, then triggers over the container's components will also trigger
the popup, provided the contained component has no popup of its own.
Images
Java images are bitmapped GIF or JPEG files that can contain pictures of just about anything. You can use any program at all to create them as long as that program can save in GIF or JPEG format.
Once loaded into Java, images,
whether GIF or JPEG, become instances of the abstract java.awt.Image class. The Image class has these eight methods:
public Image() public abstract int getWidth(ImageObserver observer) public abstract int getHeight(ImageObserver observer) public abstract ImageProducer getSource() public abstract Graphics getGraphics() public abstract Object getProperty(String name, ImageObserver observer) public Image getScaledInstance(int width, int height, int hints) public abstract void flush()However, most of the work with
images takes place in other classes, particularly java.awt.Graphics, java.awt.Component, and java.awt.Toolkit. You pass to an Image object to methods in these classes
to load and display the image.
Where to Put Images
Images displayed by Java applets are retrieved from the web via a URL that points to the image file. An applet that displays a picture must have a URL to the image its going to display. Images can be stored on a web server, a local hard drive or anywhere else the applet can point to via a URL. Make sure you put your images somewhere the person viewing the applet can access them. A file URL that points to your local hard drive may work while you're developing an applet, but it won't be of much use to someone who comes in over the web.
Typically you put images in the same directory as either the applet or the HTML file. Though it doesn't absolutely have to be in one of these two locations, storing it there will probably be more convenient. Put the image with the applet .class file if the image will be used for all instances of the applet. Put the applet with the HTML file if different instances of the applet will use different images. A third alternative is to put all the images in a common location and use PARAMs in the HTML file to tell Java where the images are.
Loading Images
If you know the exact URL for the image you wish to load, you can load it like this:
URL imageURL = new URL("http://www.prenhall.com/logo.gif");Image img = getImage(imageURL);You can compress this into one line as follows
Image
img = getImage(new URL("http://www.prenhall.com/logo.gif"));
The getImage() method is
provided by java.applet.Applet so this works inside applets. Outside of applets you can use the
getImage method from the default toolkit instead, like this:
URL imageURL = new URL("http://www.prenhall.com/logo.gif");Image img = Toolkit.getDefaultToolkit.getImage(imageURL);If you don't know the exact URL of the
image but you do know its name and that it's in the same directory as the
applet, you can use an alternate form of getImage() that takes a
URL and a filename. Use the applet's getCodeBase() method to
return the URL to the applet directory like this:
Image img = getImage(getCodeBase(), "test.gif");The getCodeBase() method
returns a URL that points to the directory where the applet came from.
Finally if the image file is stored in
the same directory as the HTML file, use the same getImage method but pass it getDocumentBase() instead. This returns a URL that points at the directory which
contains the HTML page in which the applet is embedded.
Image img = getImage(getDocumentBase(), "test.gif");If an image is loaded from the Internet, it may take some time for it to be fully downloaded. Most of the time you don't need to worry about this. You can draw the image as soon as you've connected it to a URL. Java will update it as more data becomes available without any further intervention on your part.
Load all the images your applet needs
in the init() method. In particular you do not want to load them in the paint()
method. If you do they will be reloaded every time your applet repaints itself,
and applet performance will be abysmal.
Drawing Images
Once you've
downloaded an image from a URL, it's quite simple to draw it. Once the image is
loaded draw it in the paint() method using the drawImage() method of the Graphics
class
public boolean drawImage(Image img, int x, int y, ImageObserver io)
img is a member of the Image class
which you should have already loaded. x and y are the
coordinates of the point where the upper left hand corner of the Image will be
drawn. io is an instance of a class which implements the ImageObserver
interface.
The ImageObserver interface is how Java handles the asynchronous updating of an Image.
java.awt.Component implements ImageObserver so for now just pass the keyword this to drawImage to indicate that
the current applet is the ImageObserver that should be used.
A paint() method that
does nothing more than draw an Image starting at the upper left hand
corner of the applet might look like this
public void paint(Graphics g) { g.drawImage(img, 0, 0, this);}
Presumably, img is a
field of the object which was initialized elsewhere.
Example of Drawing Images
import java.awt.*;
import java.applet.*;
public class DisplayImage extends Applet {
private Image picture;
public void init() {
String filename = this.getParameter("imagefile");
if (filename != null) {
this.picture = this.getImage(this.getDocumentBase(), filename);
}
}
public void paint(Graphics g) {
if (this.picture != null) {
g.drawImage(this.picture, 0, 0, this);
}
else {
g.drawString("Missing Picture", 20, 20);
}
}
}